DIY Gift Boxes in Nature Style

HOMEMADE for you
Creative gift wrapping has never been easier. Packing paper is not only sturdy, inexpensive and environmentally friendly, it’s also ideal for wrapping gifts up in. Too plain for you? In that case, why not add some decorative flowers using a fineliner and coloured pencils? It’s quick, easy and fun too. Then, all you have to do is fold the illustrated packing paper to a bag – finished. Your original, lovingly crafted, self-designed gift bag is ready. The DIY gift tag, handwritten using the calligraphy marker, gets your message across perfectly. A lovely ‘nature-look’ embossed tag made out of FIMO soft can be used in its place to add a creative accent – or, if you prefer, you could use both of them together.
Step-by-step tutorial
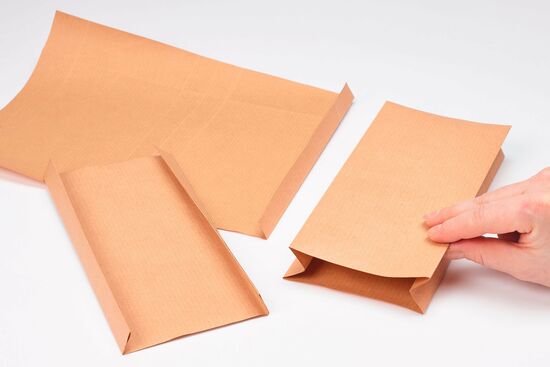
Use the aluminium ruler and pencil to measure and mark the given dimensions for the gift bags. For the folding edges, go along the side of the ruler with a pointed modelling tool first before you actually fold the paper and then smooth over the crease. Cut out an A4-sized piece of packing paper (21.0 x 29.7 cm) for the small bag and a size A3 piece for the big bag (29.7 x 42.0 cm). Measure an approx. 1.5 cm wide strip along one of the short sides of the paper and fold (gluing surface). Then fold the paper in half crosswise. This forms the front and back of the bag; these stay on top of each other whilst you continue to fold. Fold each of the long sides 2 cm in from the edge (3 cm in the case of the large bag). Then fold back in the other direction again. Stick your hand into the fold and open the paper out a little. You can see three creases. Press the centre crease inwards to create a kind of accordion effect. The other two creases are now on the outer edge. Repeat on the side of the bag where the gluing surface is.
Fold the narrow bottom edge of the paper 4 cm in (6 cm for the large bag). This creates the base of the bag. Fold both of the corners down diagonally to the lower edge of the paper. Then open up the whole sheet of paper. The bag’s folds are now visible which makes it easier for you to see where you need to draw your motifs.
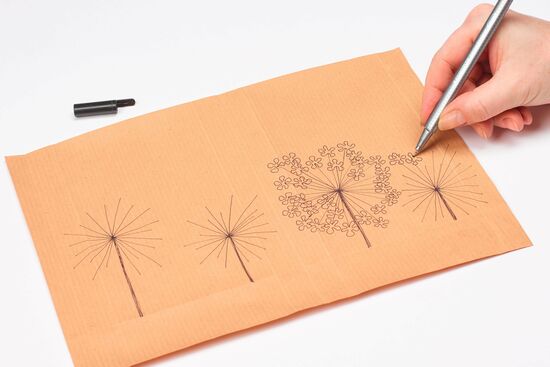
Next, it’s time to draw the flowers and colour them in. Use the black triplus fineliner to outline the stem and, at the top, a cluster of stalks with a small circle or intricate mini-blossom at the end of each one.
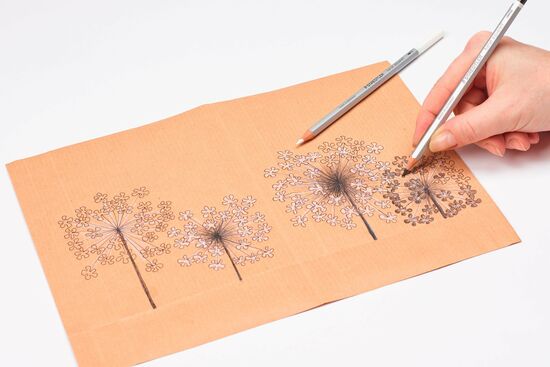
Gently shade along the edge of the stalks with the white karat watercolour pencil to give the flower a more animated look. Starting in the centre of the flower and working your way outwards, hatch with the black karat watercolour pencil and get gradually lighter as you go. This makes the umbel look denser in the middle. The intensity of colour can be controlled by varying the amount of pressure applied to the coloured pencil. Next, hatch the small blossoms or circle shapes using the white or black karat watercolour pencils. To create a 3D effect, keep the shaded parts of the motif darker and the sunlit parts lighter. With the white blossoms or circles it’s the other way round– here, less colour should be added to the shaded areas. Create subtle transitions of colour in-between. Add white to the light areas of the black motifs to make them brighter.
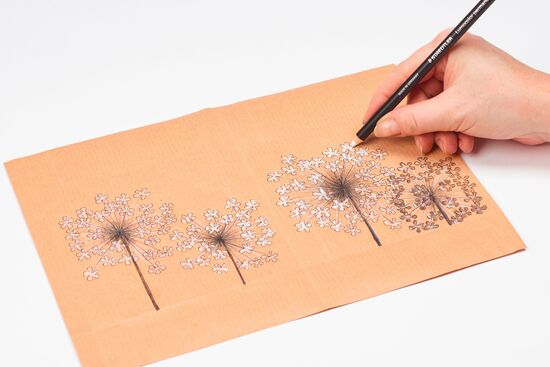
Light reflexes can be added to the circles and blossoms using the Lumocolor permanent glasochrom.
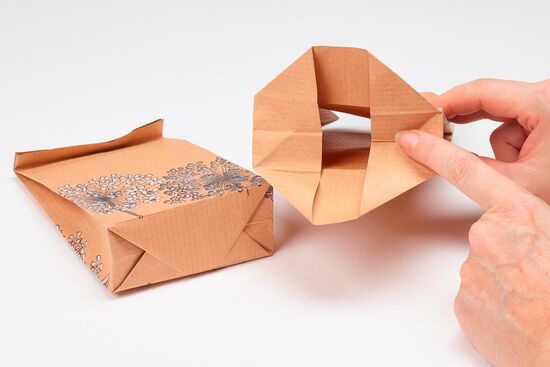
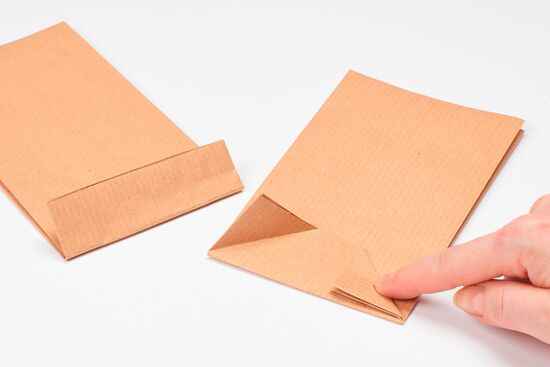
Fold the packing paper again as described in steps 1 and 2 – this time, sticking the sides of the bag together along the gluing surface after you’ve folded the paper in half (step 1). Open up the bag from the inside to the out. This opens up the base of the bag. Fold one short side of the base inwards, making a diagonal fold at the top and bottom. Repeat on the other short side of the base. This leaves you with two base flaps. Stick the two pieces of the base together.
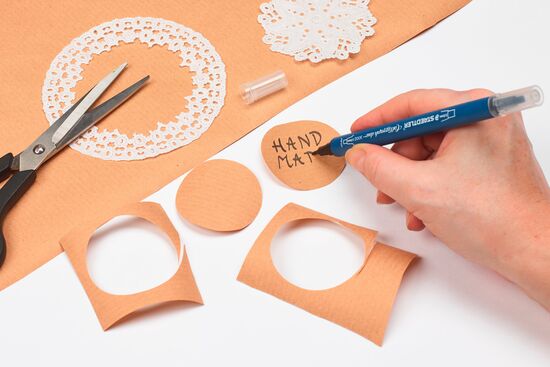
It doesn’t take long to craft a pretty gift tag out of packing paper. Use a glass approximately 5 cm in diameter to draw a circle on the packing paper and then cut the circle out. Write ‘HANDMADE for you’ on it using the black calligraphy marker (thinner tip). Cut a circle out of a paper doily making sure it‘s slightly bigger than the one you made out of packing paper and then stick the packing paper circle onto it. Attach the finished paper gift tag to the bag using a mini clothes peg.
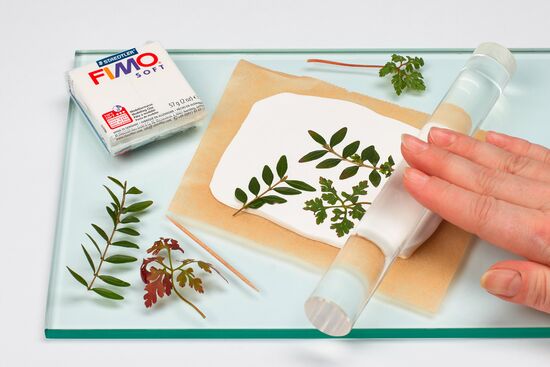
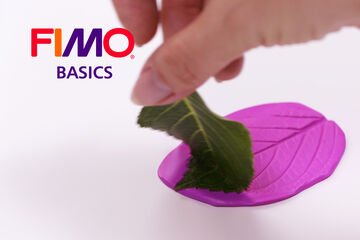
The embossing technique can be used to create easy gift tags with nature motifs that look deceptively realistic. You can use small leaves, twigs or sticks to emboss with. Roll one pack of white FIMO soft out to an approx. 2-3mm thick sheet using the acrylic roller and place this on the baking paper. Position the leaf on it and roll over it firmly with the acrylic roller. Carefully peel the leaf off – the leaf’s shape and texture are now embossed in the clay. Turn the glass upside down and use it to cut a circle of FIMO soft out of the embossed clay. Remove the excess modelling clay.
Don’t forget: Make a hole in the top with the toothpick for threading the hanger through later. Harden the FIMO soft tag in the oven for approx. 30 minutes at 110°C. Allow to cool.
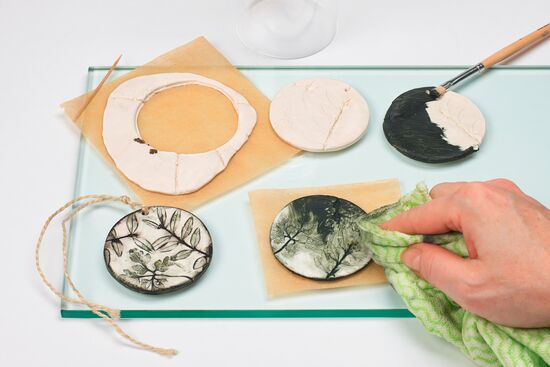
Cover the hardened tag with a good coat of black acrylic paint. Allow the paint to dry a little, then wipe it off with a moist dishcloth. Only the underlying, embossed parts of the motif are black now. Leave the tag to dry and then varnish. Thread a piece of string through the hole and tie the FIMO soft tag to the gift bag.
Tip: Your present won’t fit in the bag? No pretty wrapping paper to hand? No problem. Cut out a large enough piece of packing paper, draw decorative flowers on it and create your own wrapping paper. A hand-embossed FIMO soft gift tag gives your present an extra unique and loving touch that shows ‚I was thinking of you!‘.
Material overview

What you need
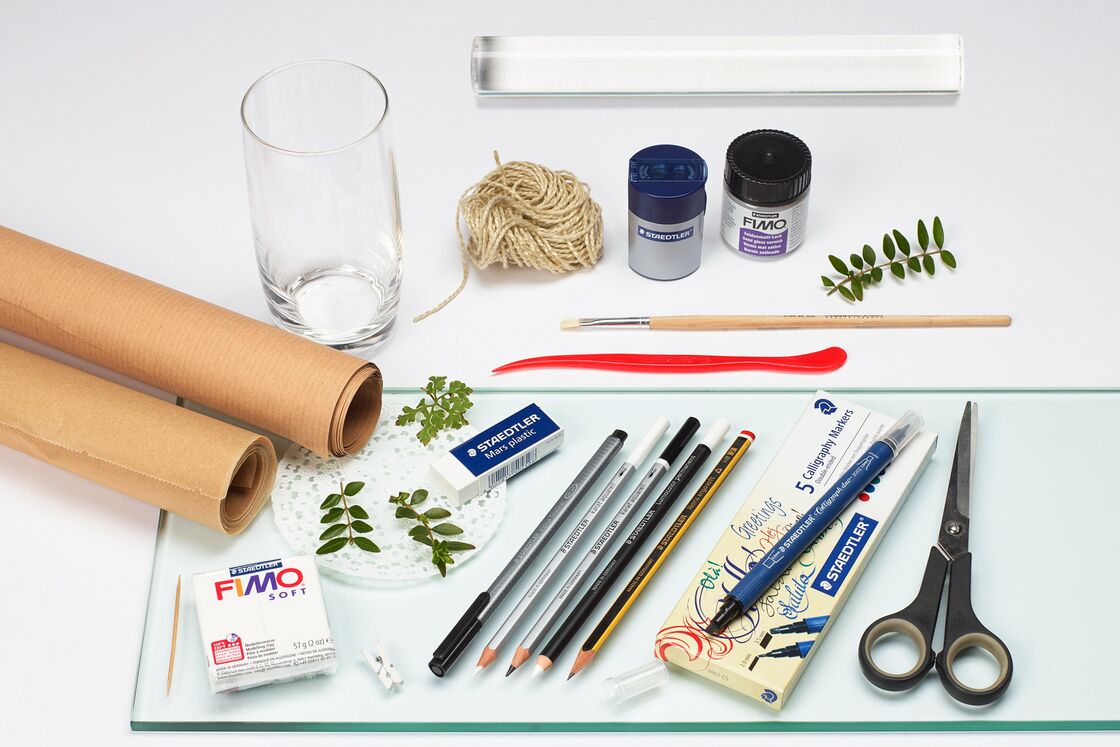
Additionally required:
Packing paper, Parcel string, Scissors, Smooth work surface (glass or ceramic), Paper glue, Baking paper, Glass (ø 5 cm paper tag and ø 6 cm FIMO soft tag), Toothpick, Paper doily, Paintbrush, Acrylic paint in black, Dishcloth, Mini clothes peg in white, Fresh small leaves or twigs
No time right now?
Save this article as PDF!