Lumocolor goes ART: Get creative with markers, street art style

Street artists embody an urban lifestyle and freely choose the substrates for their works of art. Inspired by street ART, we have developed special products with the Lumocolor ART range. They make it possible to realise creative ideas on a wide range of substrates. The special properties of the markers from the Lumocolor ART range make creative designs possible on almost all surfaces.
What is street art anyway?
Street art is the art of the streets. Colourful works of art now adorn walls, buildings, bridges and cityscapes. Street art attracts attention, brightens up grey facades and inspires people.
Even in ancient times, individual names or greetings were left on the facades of houses, ditches and city gates. Inscriptions like this were found during the excavation of the buried city of Pompeii, for example.
Street art as we know it today originated in the early 20th century. Back then, it was initially found on facades in different places around the world. The popular graffiti scene blossomed in the 1970s in the New York underground.
Street art is very diverse. It’s not just graffiti, it can have many faces: in the form of posters, installations, stickers and paintings.
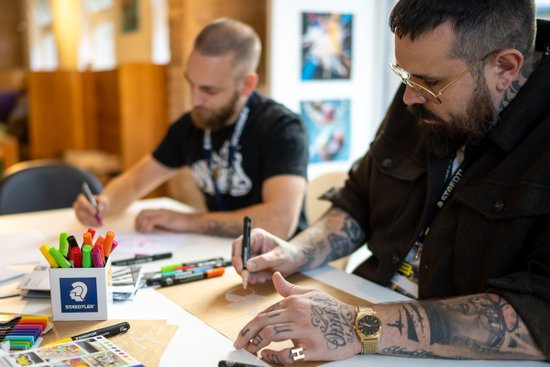
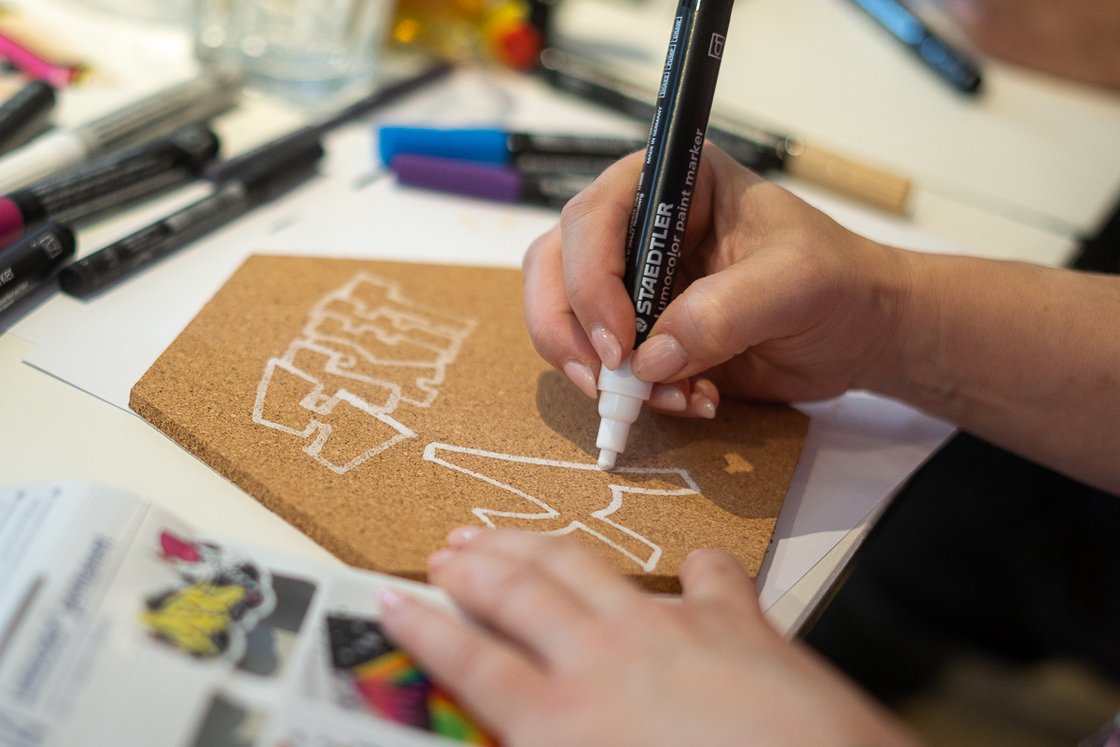
The right markers for graffiti & street art style
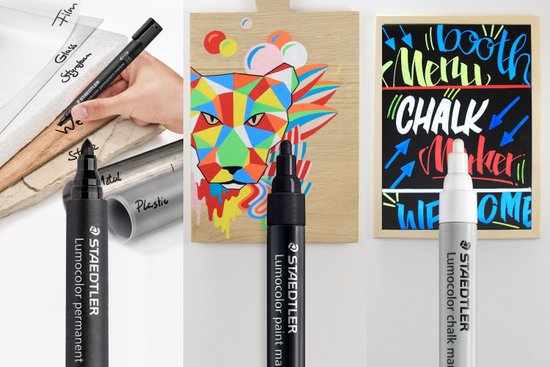
With our permanent markers, chalk markers and acrylic markers, works of art can be created on almost all surfaces using various painting and drawing techniques. Depending on the marker, individual designs and messages can be created temporarily or immortalised for the future.
Permanent markers are used to permanently immortalise works of art with brilliant ink. The chalk markers can be used to draw temporary lettering and decorations on smooth surfaces with liquid chalk. The paint markers are ideal for opaque painting on almost any light and dark surface, irrespective of the texture.
Find out all about the markers from our Lumocolor ART range here:
Street art – art for everyone

Artists on the street art scene always target the general public. In this way, they also make art visible to people who would otherwise have little access to it.
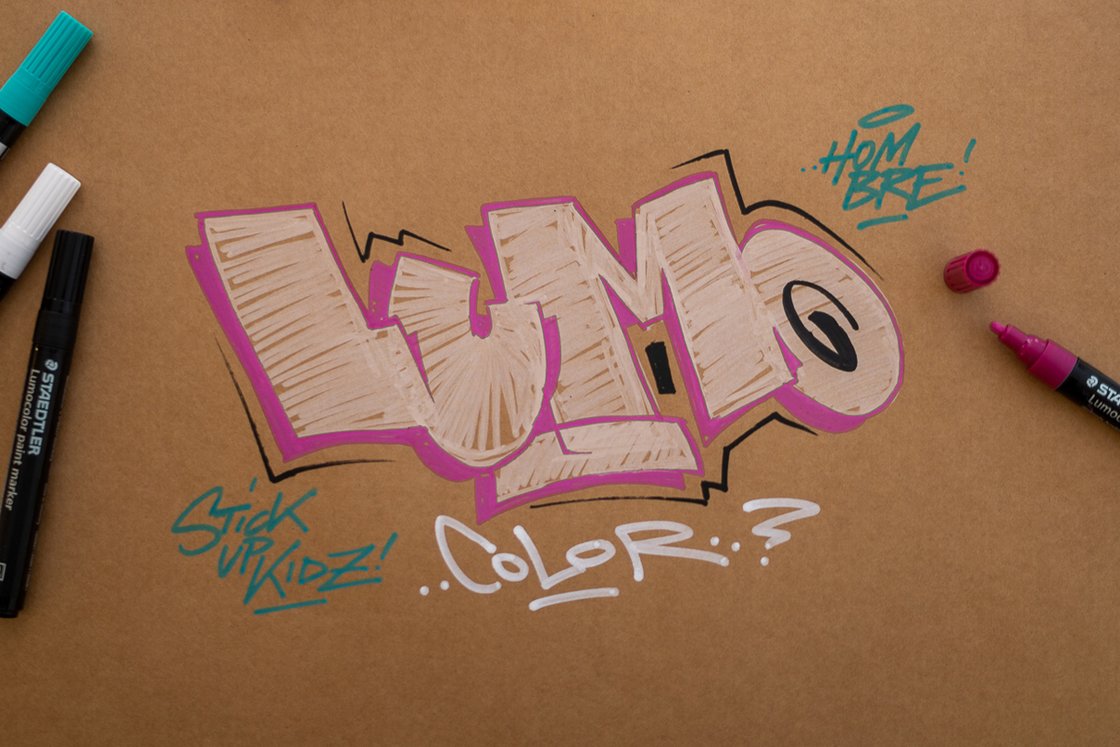
One of Germany’s most well-known street artists is Nuremberg artist Pablo Fontagnier – better known as Hombre SUK. Rich colours and detailed, comic-like figures characterise his art.
Learn how to get started with street art using the right techniques
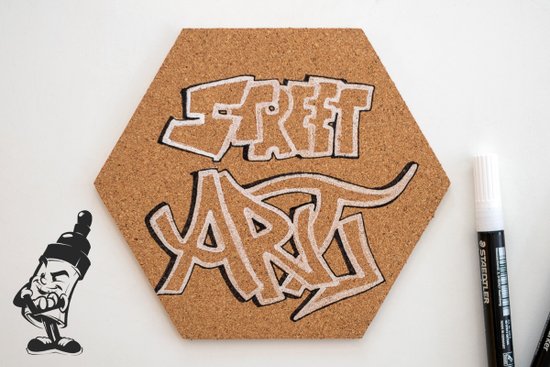
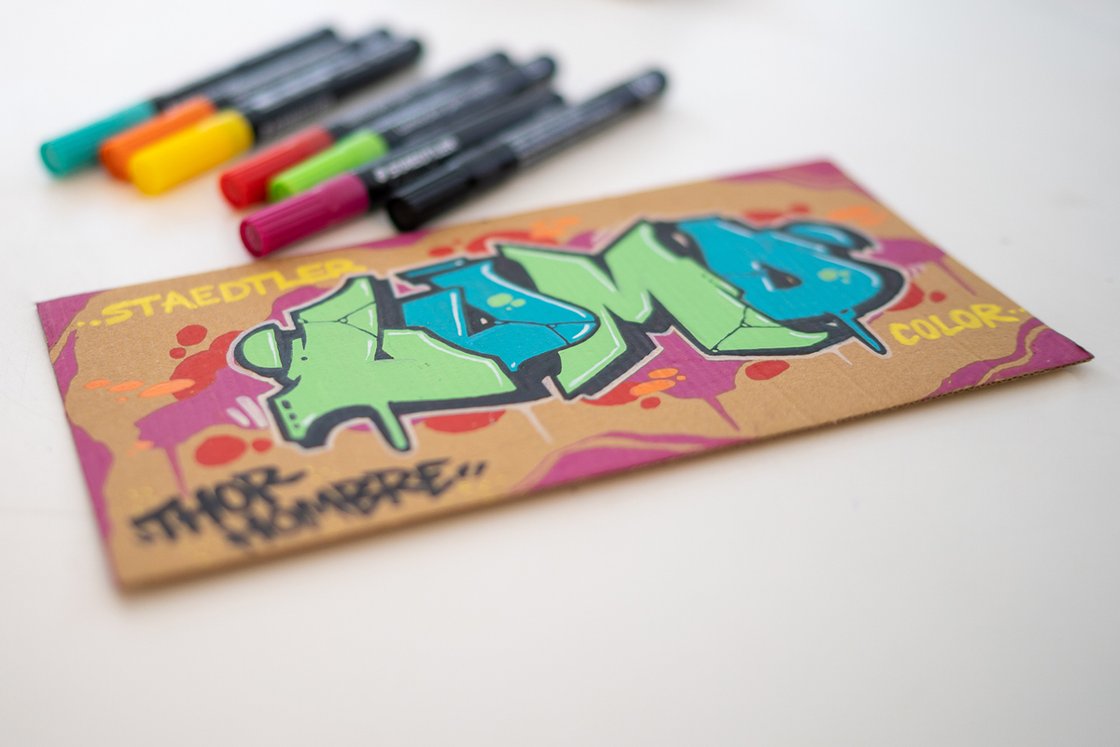
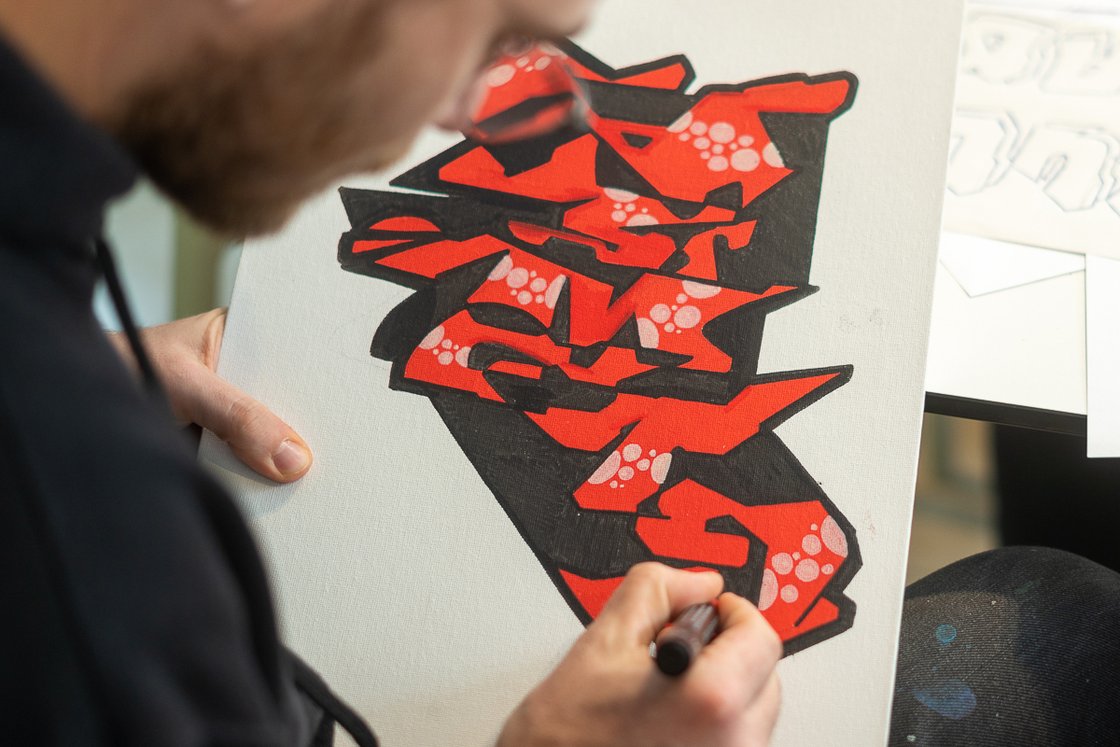
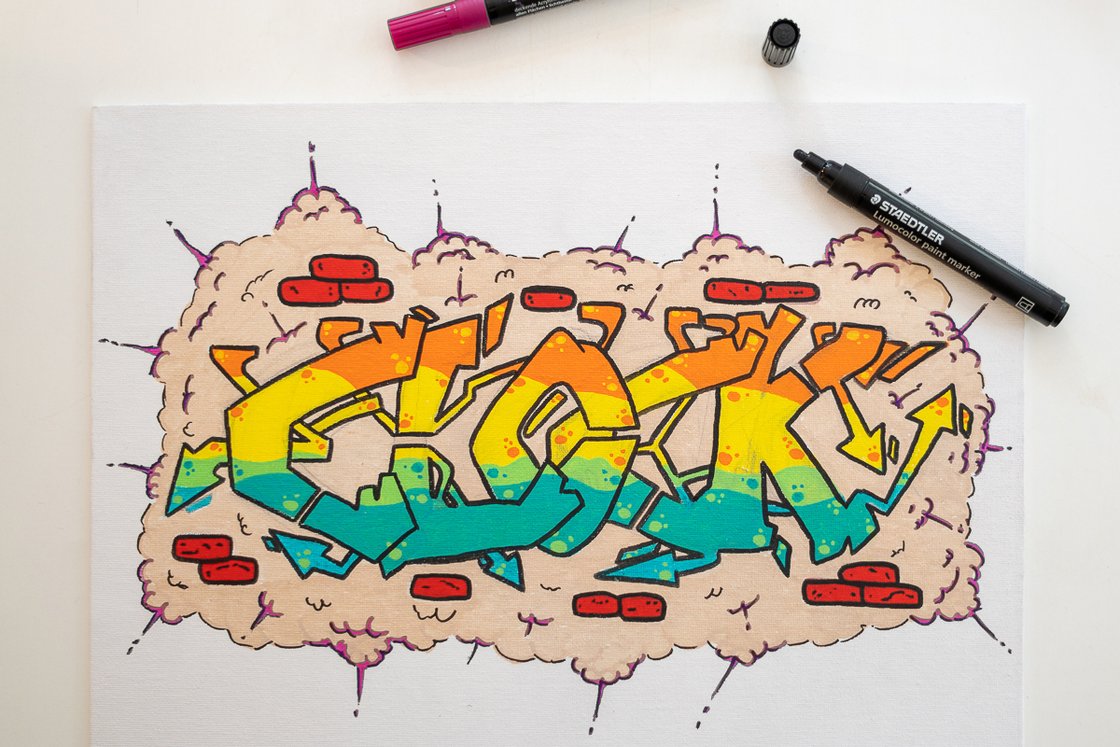
Learn how to draw graffiti-style lettering: Step-by-step instructions
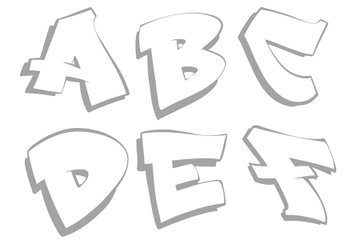
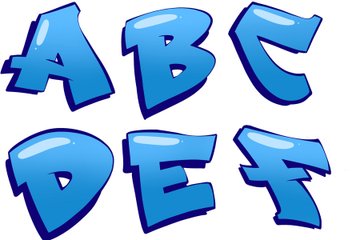
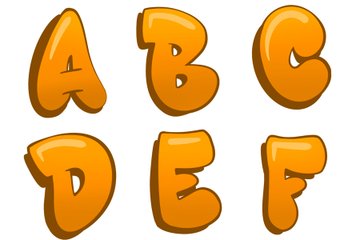
Graffiti lettering always consists of individual letters that together create an overall picture. When drawing graffiti fonts, the main task is to customise characters, numbers and fonts, similar to typography or calligraphy.
Would you like to develop your own graffiti lettering and learn how to draw it correctly? Here we explain step by step how to do this. You will need:
- Paper (preferably sketching paper with a minimum grammage of 140 g/m)
- Acrylic markers
- Pencil
- Eraser
How to draw graffiti lettering
- In the first step, draw an ordinary print letter on the paper.
- Next, draw each line of the graffiti letter as a bar. A continuous bar with four sides must be created for each individual line. In this phase, it is important that each bar has the same thickness.
- Now you know how many bars a single letter is made up of. So in step 3, you can start to creatively redesign it . However, make sure that the guide lines of the letter are retained, as these form the basic framework.
- You can lengthen or shorten individual bars , make them thicker or thinner at one end, or even bend or kink.
- Using the acrylic marker, trace all contours of the letter, except for the overlaps of the individual bars. This contour is also called “outline” when drawing the graffiti lettering.
- Now add some depth to the graffiti lettering: To do this, offset the outline of the letter diagonally or laterally by drawing short, equal lines at the corners of the letter. These all flow in the same direction. Draw these lines for all corners where the new line does not flow within the letter .
- Now connect the offset lines to each other. The resulting contours must run parallel to the original outline of the letter. This adds depth to the letter, which is also called a “3D block” or just a "block" when drawing graffiti lettering.
- Colour in the letter (also known as “fillin”).
- Let your creativity run wild and add highlights, colour gradients or tags to your letter. The highlights should be placed in the same place for each letter to create an impression of light and shadow sides. You can place the tags where you like to create the most exciting picture possible. How about a crown, a star or a halo, for example?
Tip: As a final step, draw a second contour in a particularly bright colour around your graffiti lettering and block. This second contour is used to distinguish your lettering from the background, which you can of course also make colourful, as in our case with a purple bubble. The second contour is also known as the "second outline".


Download our examples of letters, numbers & symbols to practice:
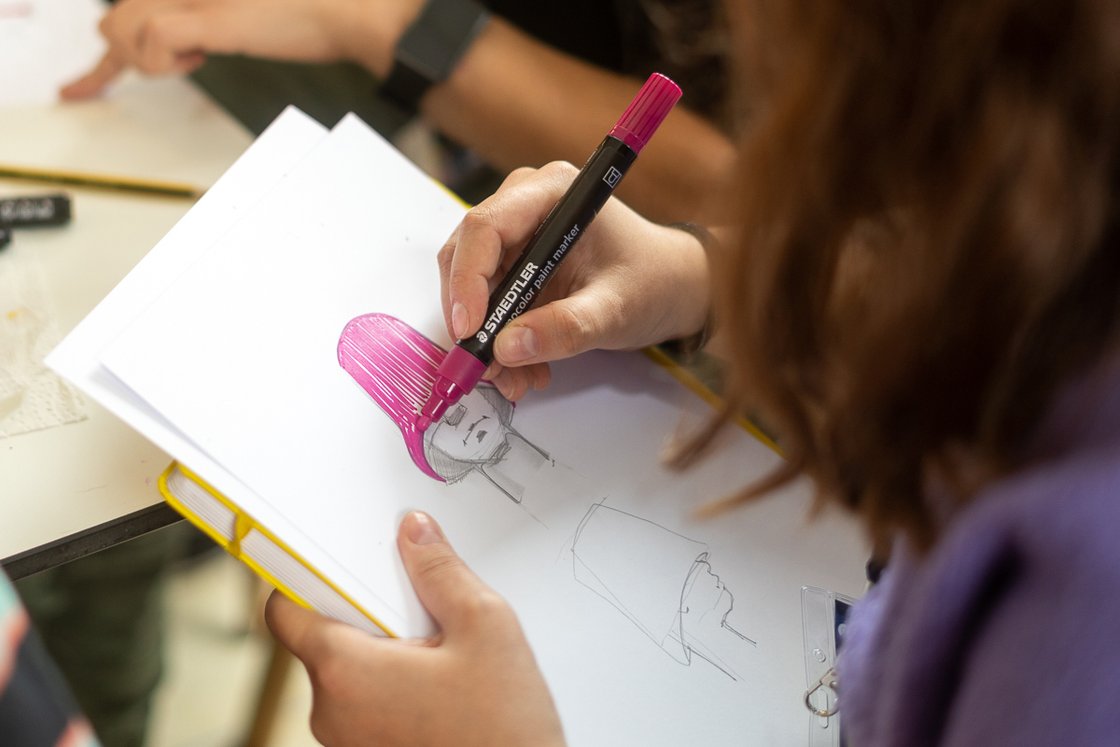
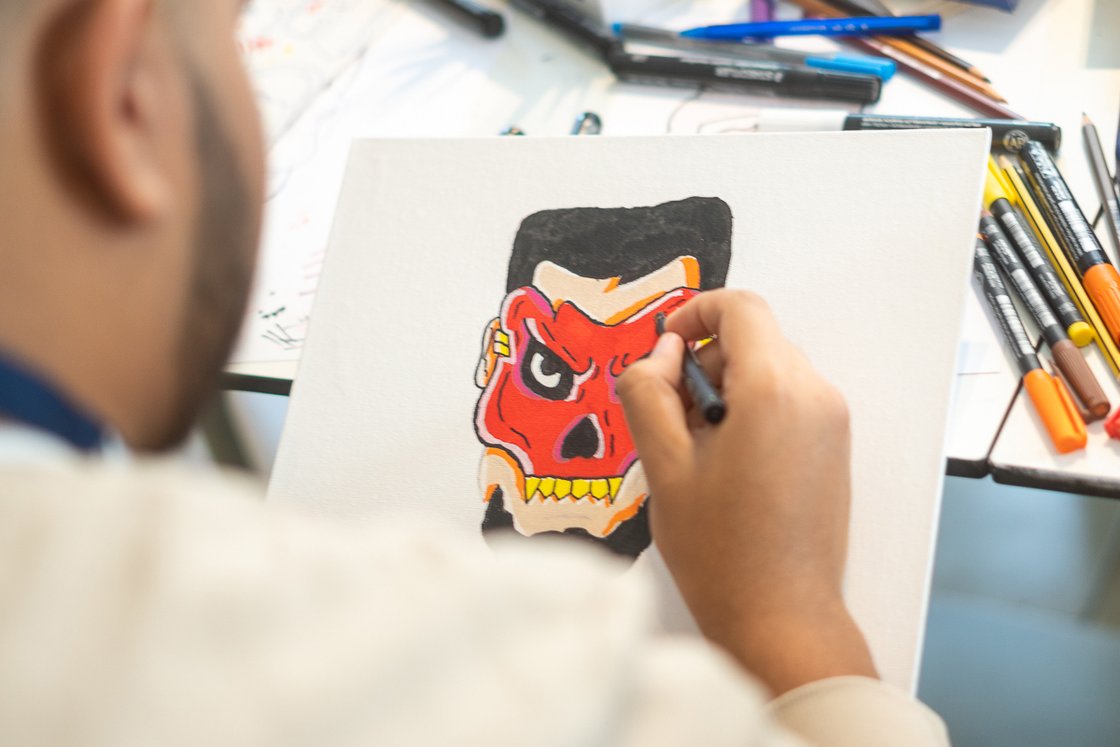
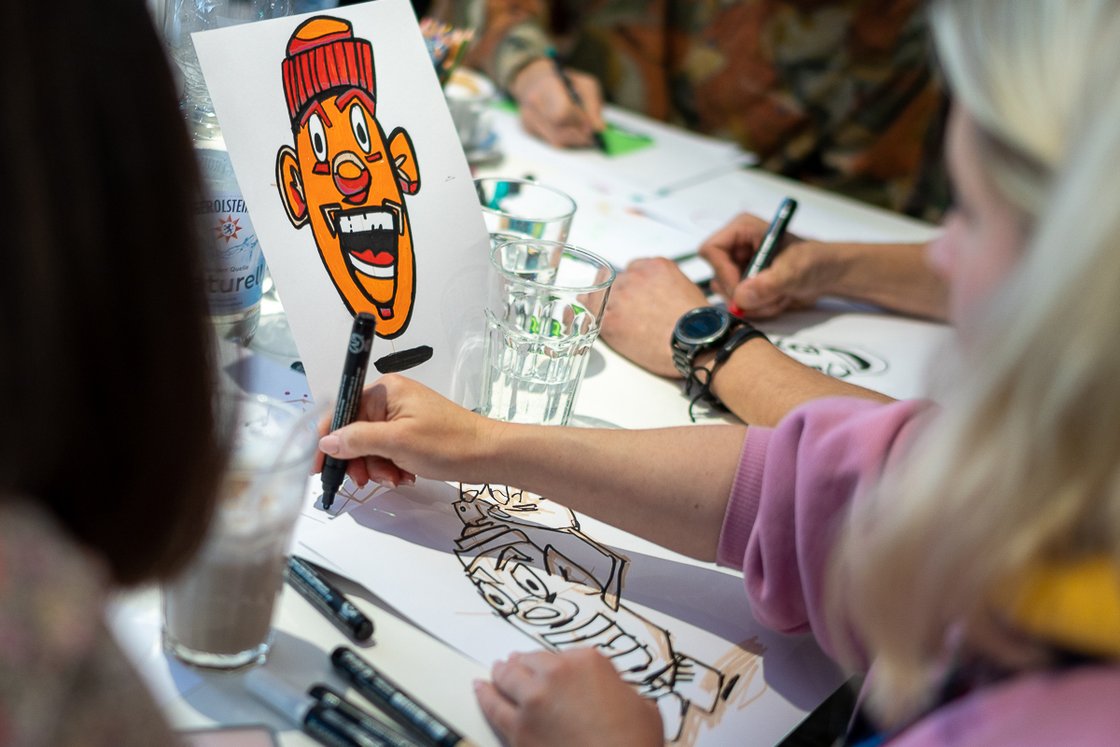
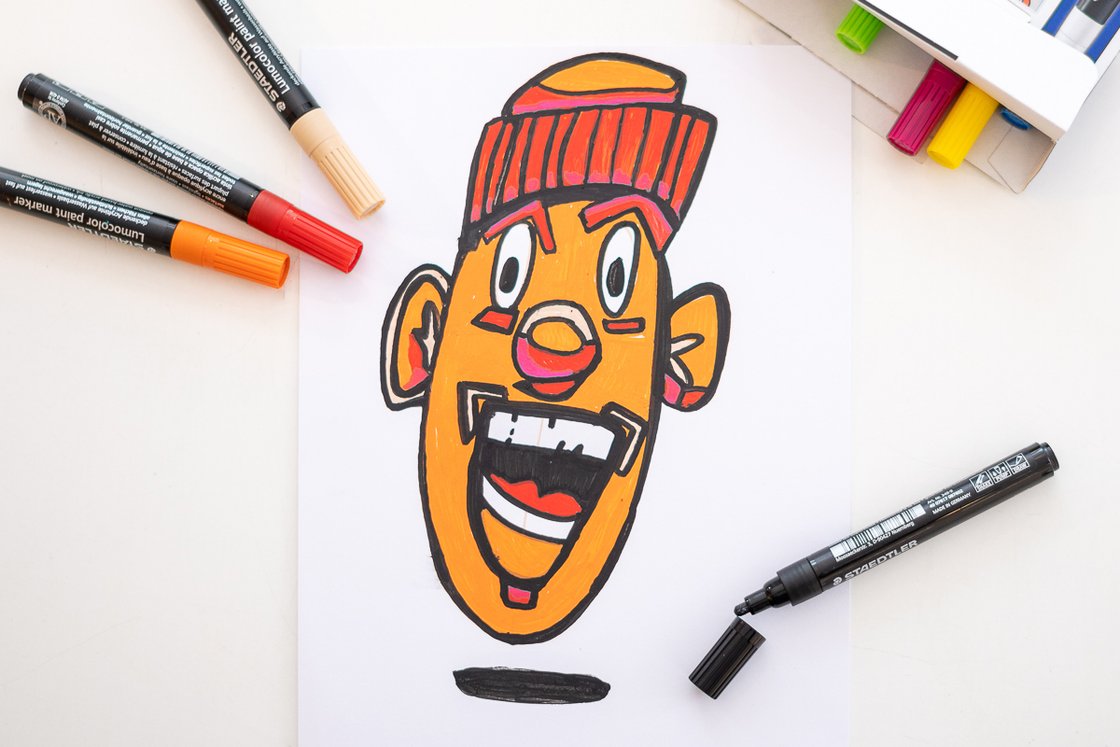
Learning to draw graffiti characters: A quick guide
You only need a little practice to draw street art graffiti figures. In this short guide, we will show you a few techniques to easily create graffiti characters and cartoon-style characters yourself. You will need:
- Paper (preferably sketching paper with a minimum grammage of 140 g/m²)
- Acrylic markers (for colouring and adding depth and shades to create 3D effects)
- Pencil (for preliminary sketches)
- Eraser
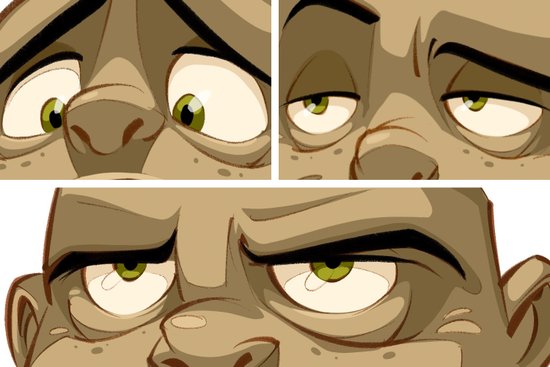
Drawing the eyes of a graffiti figure
You should always start with the eyes when drawing your graffiti figure. If you draw the head shape first, you run the risk that the rest of the face, such as the eyes, nose or mouth, will not fit proportionally, i.e. be too small or too large. Comic characters usually have relatively large eyes. You can make the eyes round, semicircular or even square. The position of the pupils determines the viewing direction. Add a little light effect here with the help of a white contour to give them extra shine.
Emotions can be particularly well represented through the design of the eyes . Wide open eyes with lots of white around the pupil can, for example, indicate surprise, horror or fear. Half-open eyes, on the other hand, can show relaxation or boredom. The eyebrows can also be used very well to show emotions, for example, a raised eyebrow indicates scepticism, while contracted, deeper brows may indicate irritation or anger.
Drawing the nose of a graffiti figure
From simple to highly detailed, you have so many options when drawing the nose of a graffiti character. In any case, make sure that the style matches the overall image of the character. If the nose is very detailed, but the rest isn't, it will quickly look weird.
The simplest shape of the nose is a drawn curve, which indicates the highlighting on the face. You can also draw only the nostrils or nasal wings. Try it out quickly to find out what best suits your style.
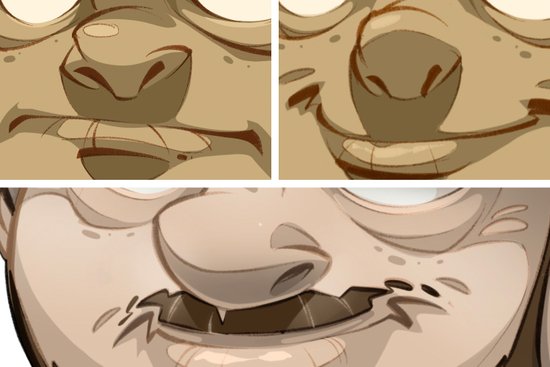
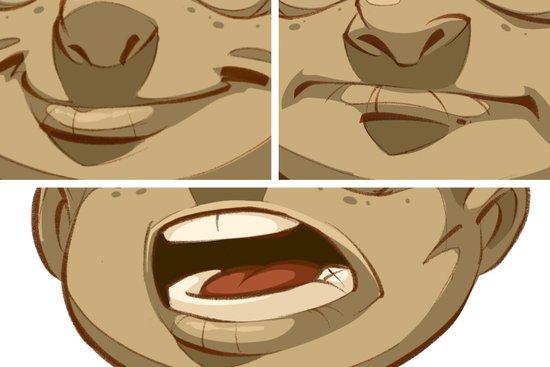
Drawing the mouth of a graffiti character
In addition to the eyes, the mouth also makes a big impact on the overall impression of your character. Small adjustments can create very different facial expressions here: a slightly upwardly curved mouth gives a friendly, happy impression, compressed lips appear fierce and an open mouth can, for example, indicate a cry or even laughter. With an open mouth, you need to think extra about the teeth and the inside of the mouth. That’s why a closed mouth is more suitable when getting started.
Again, the shape and detail should match the overall appearance of the character so that everything looks right. Again, practice, practice, practice. The more you experiment, the more you can create your own style.
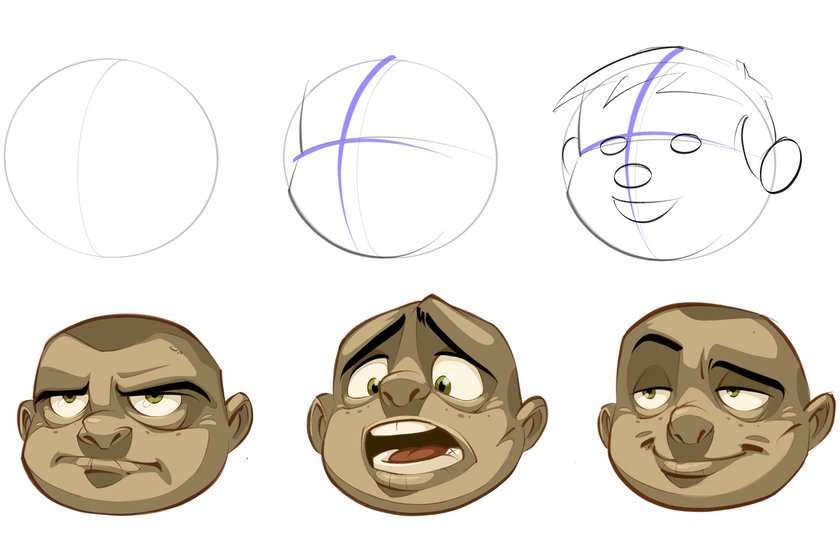
Drawing the head of a graffiti figure
In the last step, draw the head of your graffiti character. Think about what the character’s head should look like beforehand: from round, oval to square, anything is possible here. There are also aspects such as a pointed or tapered chin, wide or narrow cheeks, large or small ears. Let your imagination run wild!
My biggest tip for beginners:
If you’ve just started drawing graffiti figures, it’s a good idea to start by drawing a bald/shaved head or someone wearing a hat or baseball cap. Once you have a little more experience, it will be easier to draw hair.
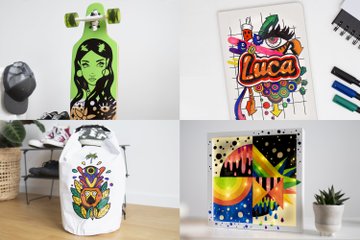
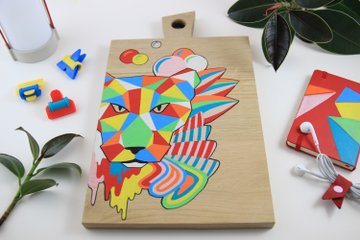
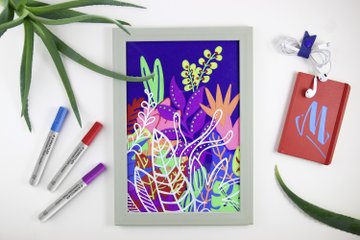
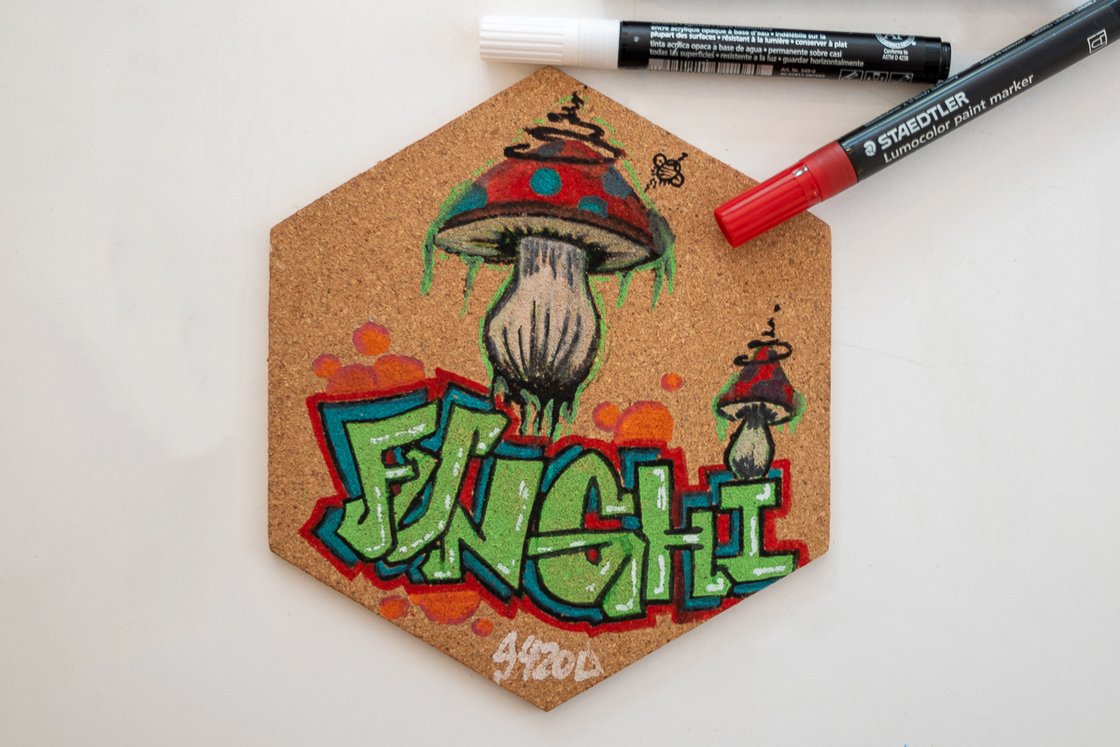
Looking for inspiration for your first street art project?
Be inspired by the street art examples!


Step-by-step instructions for getting started with our products
Here are some tutorials with detailed step-by-step instructions on how to put your personal project into practice with the markers. Of course, you can let your creativity run wild and add your own ideas to the project. Here you can find out above all on which substrates you can work best, with which markers.