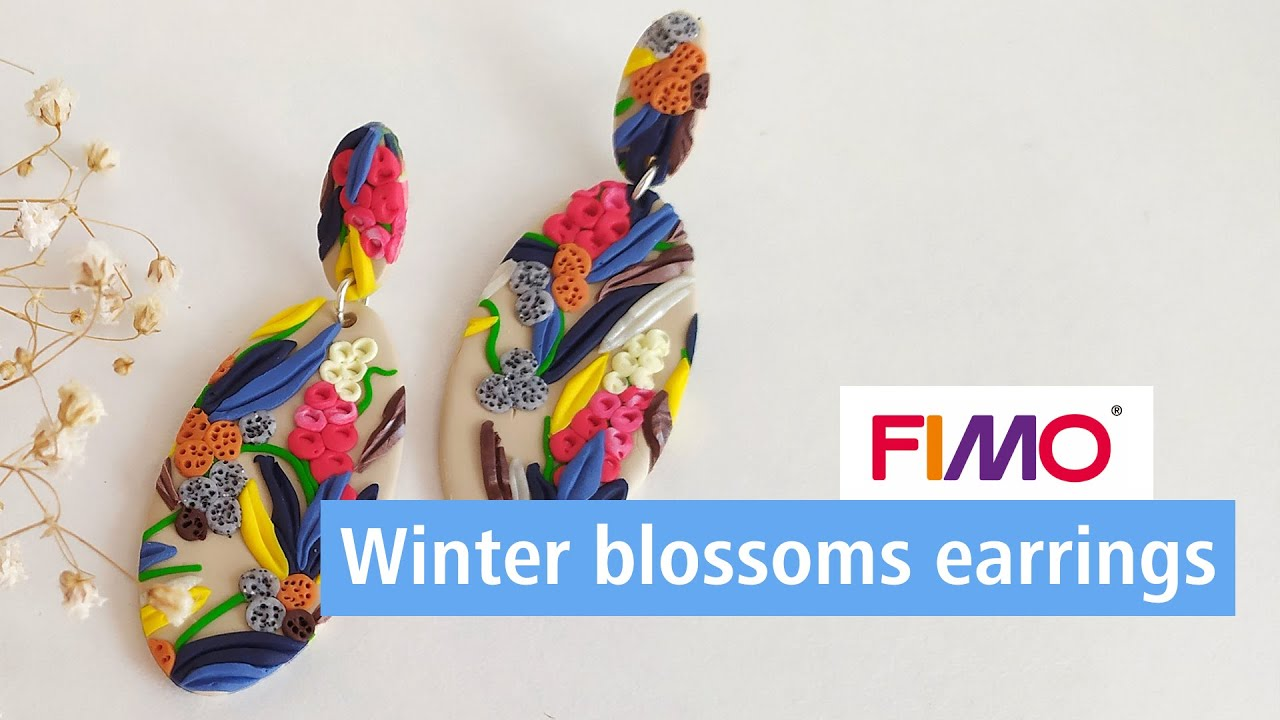
Winter blossoms earrings made of FIMO

Floral patterns are currently very popular and an indispensable part of fashion. With their winter blossom design, these DIY earrings reflect stylish, classic floral patterns that not only shine brightly in winter. A dark blue, warm brown and bright berry tones let us get warm around our hearts. Matching the cooler season, the monochrome background contrasts strongly with the striking bright colours of the flowers.
Design your own unique flower pattern and create your own unique DIY FIMO jewellery.
Step-by-step tutorial
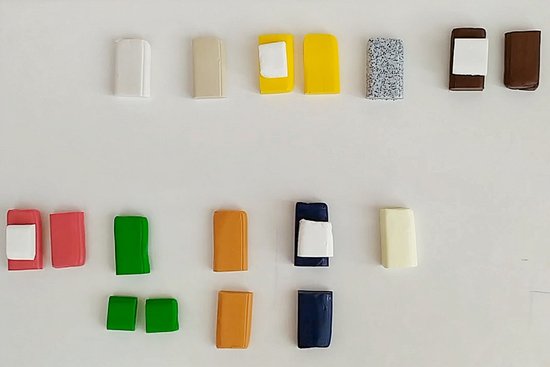
You need different FIMO colours for these pretty floral earrings. We have used the following FIMO soft / FIMO effect colours, but of course you can also create your own favourite colours: 8020-0, 08, 70, 16, 803, 75, 26, 53, 4, 35, 105.
Cut half a strip from each colour. You need two strips of white. This allows you to mix the different colours even lighter.
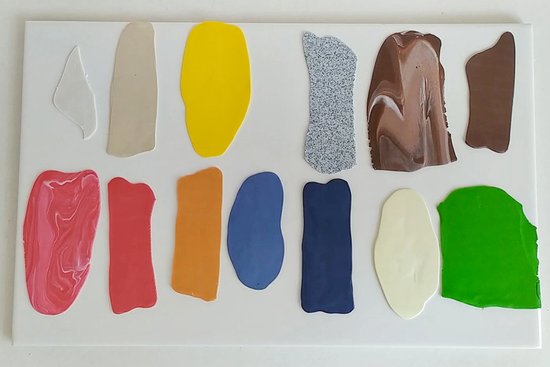
Now mix a few lighter shades using a little white FIMO. E.g. a lighter blue and a lighter yellow. To do this, completely combine the two colours. You can also create beautiful marble effects by not kneading the two colours together completely. Now roll out a thin sheet from each piece with the FIMO acrylic roller.
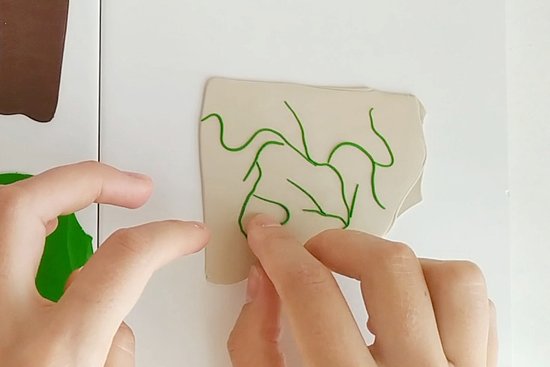
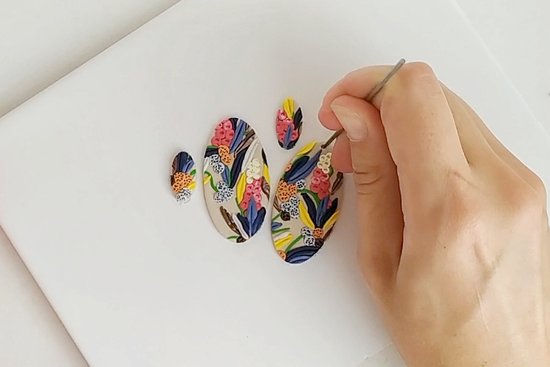
From now on, work directly on an ovenproof, small tile or on baking paper. This means that your FIMO earrings can move directly into the oven on the tile and you no longer have to lift the FIMO later and don't warp it. Select a sheet as the base colour, e.g. FIMO soft Sahara. Cut a little FIMO soft tropical green and roll a very thin strand. Place small pieces from the stand on the Saharan FIMO sheet. These are the flower stems.
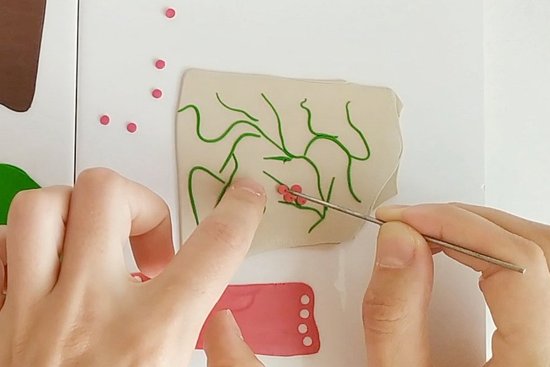
Make small circles out of a colour of your choice with a mini cookie cutter. Place them on the FIMO plate using a bead piercing pin. These will be the first flowers and berries.

Now use a sharp knife from other colours to cut out elongated petals. Also place them on the FIMO plate on the flower stems.
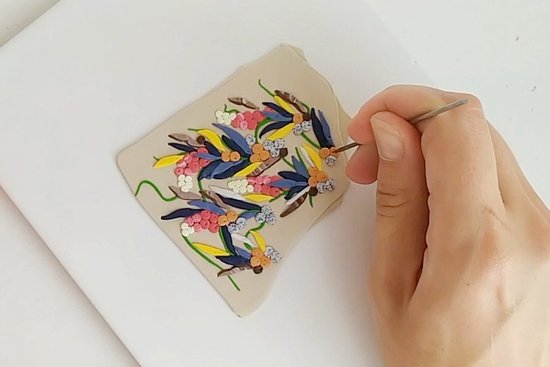
Once you are satisfied with your motif, you can use the bead piercing pin to add a few visual highlights. Punch small dots into the flowers or draw lines into the leaves, for example. This makes the look even more exciting.
Now use an oval cut-out shape to punch out the basic shapes of your earrings. You need 2 large ovals and 2 smaller ovals. Now punch a hole at the top edge. The bending ring is later fastened there. Make sure the hole is large enough.
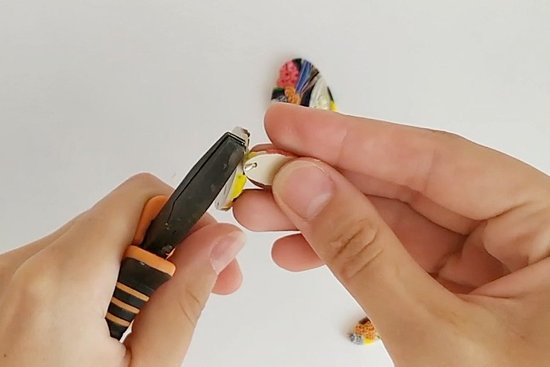
Now harden your earrings flat in the oven for 30 minutes at 110° C / 230° F. Let everything cool down well. Then attach the small oval to the large oval using a pair of jewellery tongs and a bending ring. Glue a stud earring on the back of the small oval with instant adhesive.
Material overview
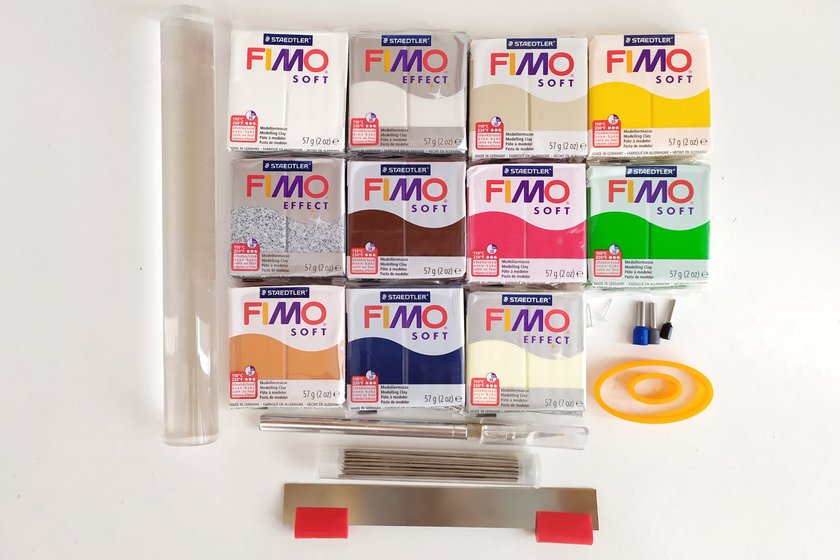
What you need
Additionally required:
Smooth work surface (glass or ceramic), Baking paper, Mini cookie cutters round, Oval cookie cutters (small and large), Jewellery tongs, Pattex Ultra Gel instant adhesive, Stud earrings, Bending rings
No time right now?
Save this article as PDF!