Crafting with FIMOair air-drying modelling clay made easy
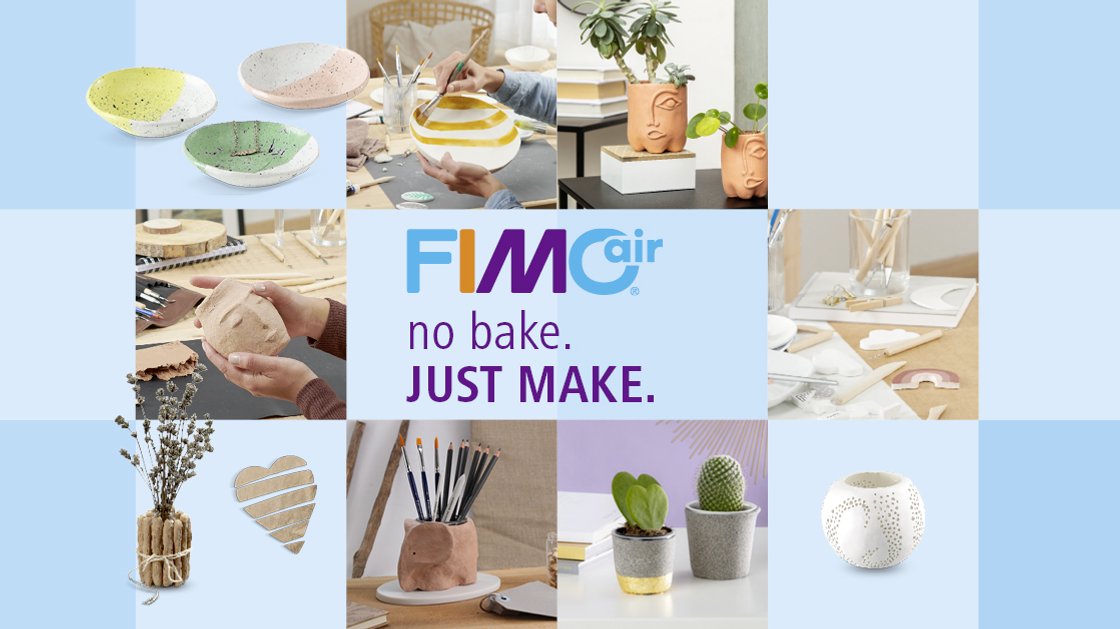
FIMOair is a modelling clay that can be used in a wide variety of areas. For example, in kindergarten or at school as part of creative projects. Crafting with FIMOair is also popular with all other age groups and hobby artists who want to create DIY decorations or other works of art. But what exactly is FIMOair? Find out below.
Crafting with FIMOair - the most important properties of the modelling clay
FIMO is a modelling clay that is used to create unique works of art. Various types of FIMO are available, which differ mainly in the way they harden. Oven-hardening FIMO compounds, such as FIMO soft, effect and professional, must be hardened in the oven, whereas FIMOair hardens in the air. For this, the former FIMOair basic (now FIMOair) requires at least 24 hours, but the drying time of FIMOair also depends on the thickness of the model figure. The air-drying modelling clay FIMOair therefore does not require an oven at all.
Although the air-curing clay does not harden in the oven, the result still has a high breaking strength. Further advantages of the air-drying modelling clay:
✔️ FIMOair is largely made in Germany from natural raw materials - and is toxicologically and dermatologically tested.
✔️ Air-drying FIMOair also scores highly in comparison to clay. In addition to the great advantage that no kiln is required for hardening, no water needs to be added for processing, which may be necessary with some types of clay. Nevertheless, you can use it to implement some clay techniques and create beautifully shaped works of art. Plus: You can knead, shape and cut out your FIMOair modelling clay however you like. Once your artwork has hardened, you can paint the surface and create a truly unique piece.
FIMOair now in new design
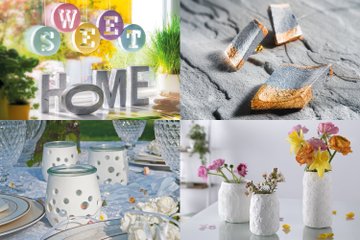
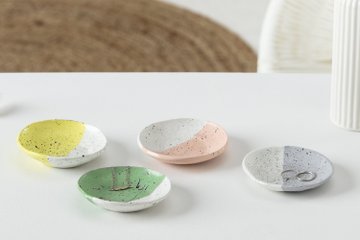
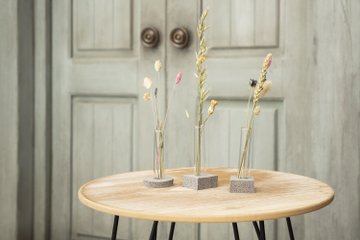
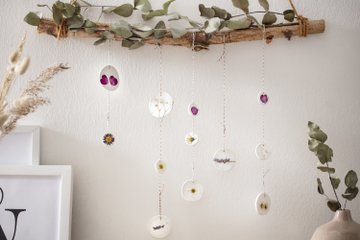
FIMOair now comes in new packaging and with a new name: FIMOair basic becomes FIMOair! The new FIMOair impresses with its optimized recipe and high quality - for artistic figures and other works of art. Because: FIMOair modelling clay can be used to create many craft ideas - from decorative items such as vases and bowls, gift tags and detailed pieces of jewellery to a variety of other home decor items. As you can see, the possibilities and craft ideas with modelling clay are almost limitless!
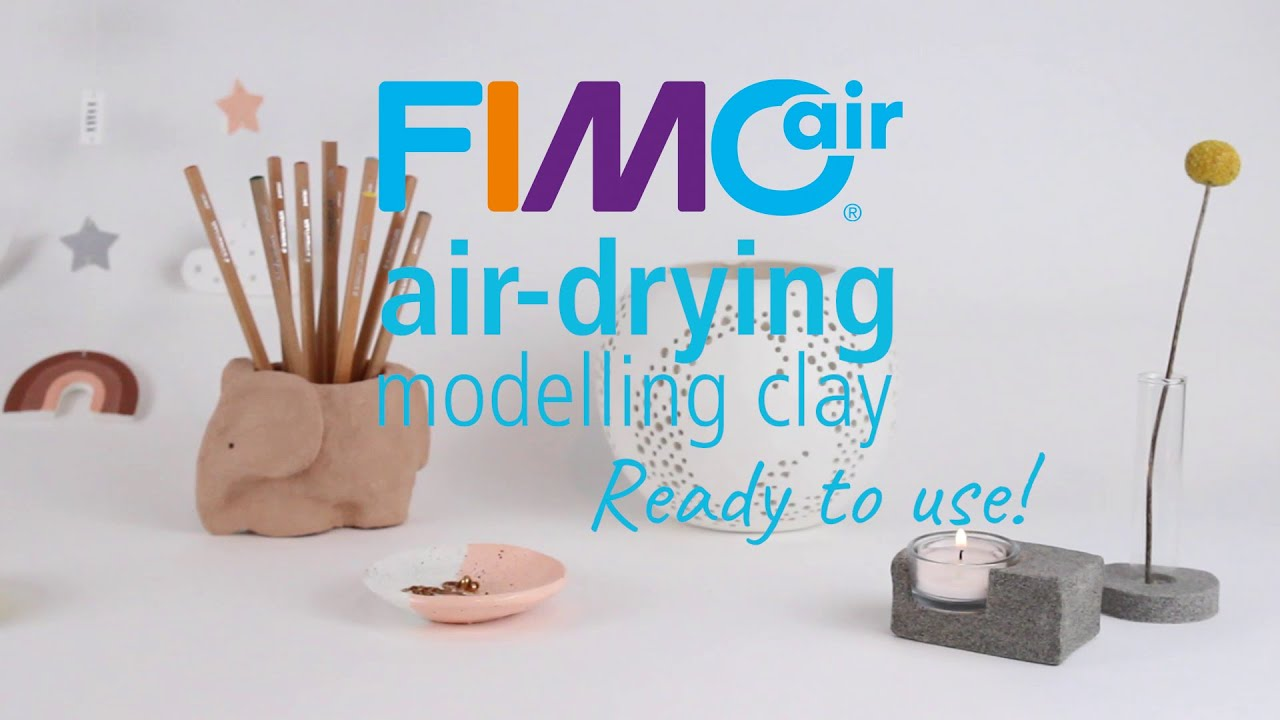
Overview of the different sorts of FIMOair
| FIMOair | FIMOair light | FIMOair granite-effect | FIMOair wood-effect | |
| Characteristic | Clay-like | Extra lightweight | Granite-like | Wood-like |
| Air-drying | ✔ | ✔ | ✔ | ✔ |
| Weight | +++ | + | +++ | ++ |
| Colours | white, pale pink, terracotta, grey | white, terracotta | granite effect | wood effect |
| Painting & varnishing | ✔ | ✔ | ✔ | ✔ |
| Sanding, filing, drilling | ✔ | ✔ | ✔ | ✔ |


The properties and processing options of FIMOair at a glance
Clay-like
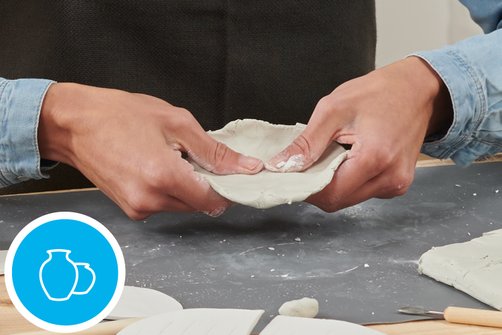
Do you enjoy modelling with clay, but find the effort too much? With its clay-like texture, FIMOair is perfect for modelling a wide variety of objects.
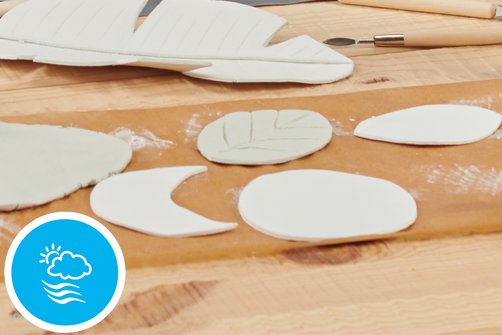
Air-drying
No bake - just make. Is it really that easy? Yes! FIMOair is not hardened in the oven - the modelling clay dries in the air!
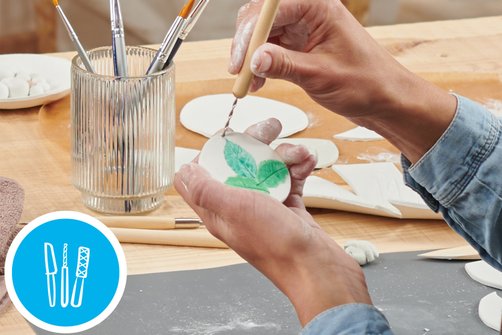
Carving, drilling, filing
Want to hang up your project? No problem - just drill a few holes. You can also carve and file dried FIMOair.
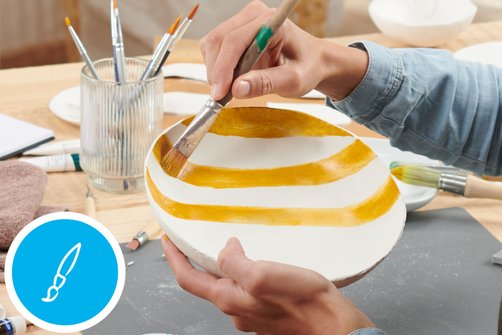
Painting & varnishing
White isn't exciting enough? Then grab some acrylic paints or a permanent marker and give your pieces a personal touch.
Want a little more sparkle? Simply apply some varnish and your object will shine and shimmer.
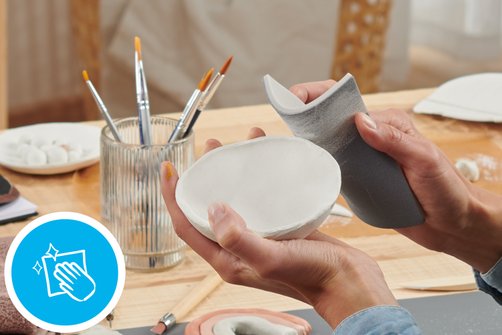
Sanding
Are the edges a little bumpy? Then simply sand them and make them soft and smooth.
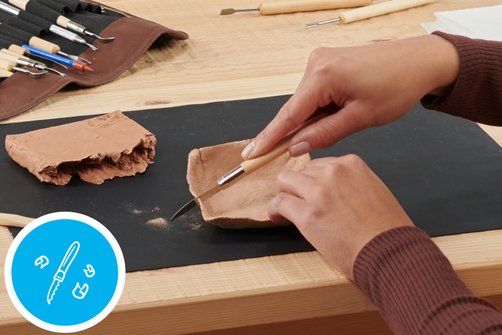
Sawing
Need to customize your creation? You can use a saw for modelling clay to remove unwanted parts, for example.
Applications and instructions
FIMOair Basics
In the following video, you will learn how to create an optimal workspace and which tools, aids and surfaces you need to work successfully with FIMOair. We not only explain how to condition FIMOair clay correctly, but also give you helpful tips on storage, recycling and disposal.
The right work surface
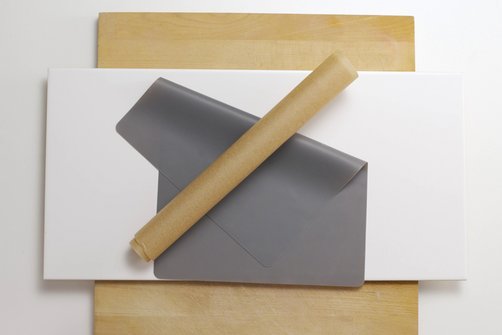
A wide variety of surfaces are suitable as a work surface. These include tiles, smooth wooden boards, silicone mats or baking paper. However, you should not work with FIMOair on glass surfaces - the modelling clay can stick to them.
FIMOair accessories
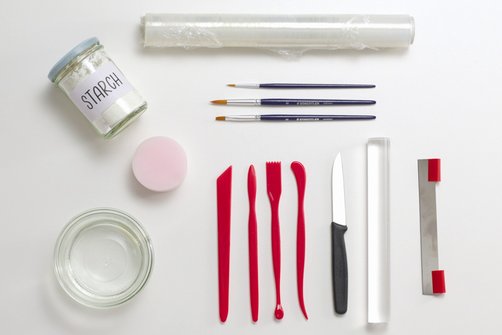
To make your craft project a complete success, the right basic equipment is essential. This includes:
- Roller for rolling out
- small sponge
- brushes
- Modelling tools
- Blade and / or knife
- Bowl with water
- Optional: cornstarch & cling film
Surfaces for application
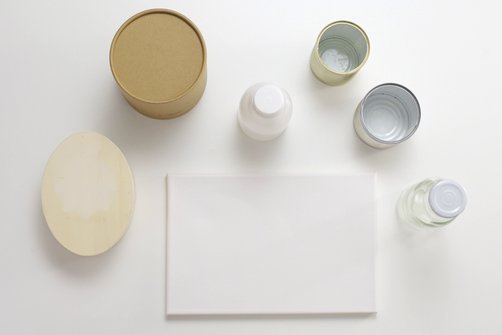
Numerous surfaces are suitable as substrates for application. Among them: Cardboard, wood, metal or cans, canvases or glass. If cracks form, they can be filled with fresh FIMOair paste.
Storage & recycling leftovers
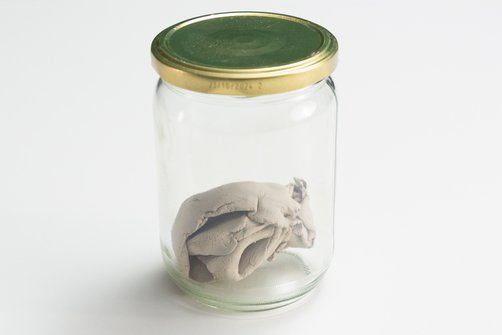
You've finished your crafting session for today, but you still have some FIMOair clay left over? You can store small leftovers with a few drops of water in an airtight container such as a screw-top jar.
The same applies to packs that have already been opened - these should also be stored in an airtight container at room temperature and conditioned with a few drops of water - especially if you want to store the clay for a longer period of time. No longer need the FIMOair leftovers? Then you can simply dispose of them in the residual waste.
Techniques and tips for working with moist mass
Condition the FIMOair modelling clay
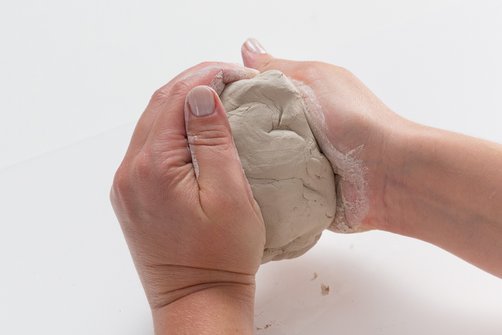
Especially if the modelling clay has not been kneaded for a long time or has been stored in a pack that has already been opened, you should knead it well so that it becomes homogeneous and smooth.
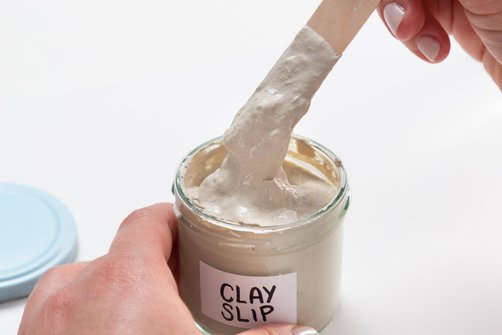
Make the slip
Make slurry by placing a few pieces of FIMOair in a small bowl. Then pour enough water over them so that all the pieces are completely covered. Leave them to soak overnight and mix them together the next morning until you have a creamy mixture.
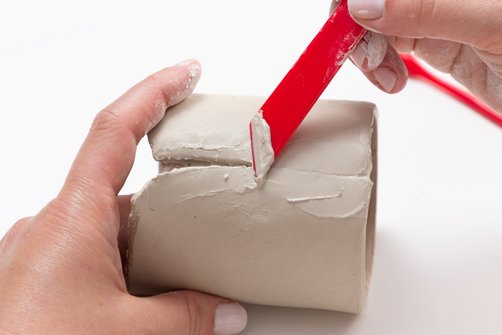
Join edges with slip
Do you want to join two edges together? Then roughen them and then apply slip to the connecting surfaces with a brush. Now you can press the edges together and smooth out any excess slip using a modelling stick.
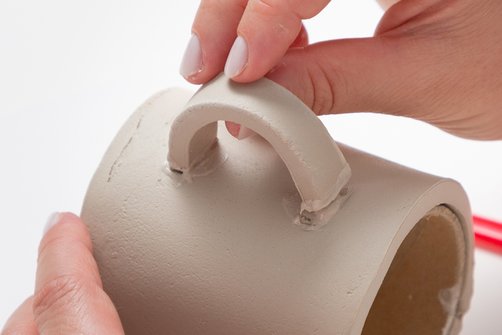
Attach parts with slip
Roughen the surface of the parts to which the part to be attached is to be attached. The edge of the part to be attached should also be roughened to ensure better adhesion. In a second step, you can apply the slurry to the rough areas and press them together. In a final step, you can smooth out any excess slip with a modelling stick.
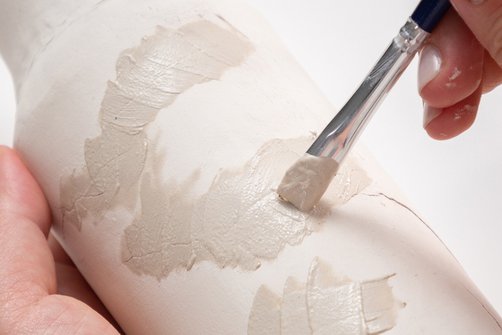
Repair cracks with slurry
First apply slurry to the crack with a brush and smooth the surface with your fingers and a little water. Repeat this process until a uniform surface is created. If necessary, you can repeat this process after it has dried.
Correct drying
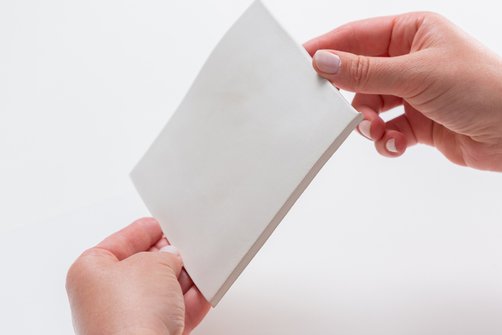
Drying times
The curing time of the FIMOair modelling clay depends on the wall thickness, size, room temperature and humidity and can take several days. If possible, you should allow your artwork to dry slowly at cooler temperatures - this will ensure greater resistance to cracking and dimensional stability. However, you should definitely refrain from using a hair dryer - this can deform models or cause cracks.
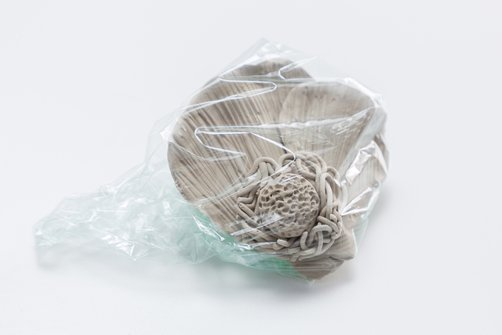
Storage during drying
To ensure that all surfaces of the modelling object dry evenly, you should turn it over during the drying process. However, only turn the object after 12 hours to avoid deformation. You can cover delicate objects with foil to prevent flaking and stress cracks.
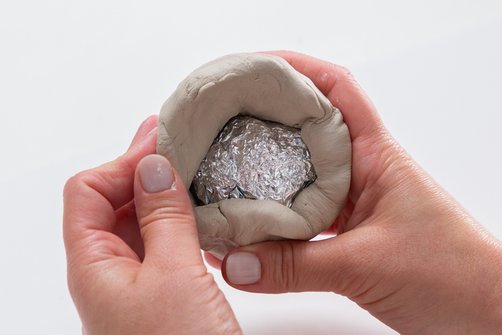
Avoid stress cracks in larger objects
The wall thickness of your artwork should not exceed 3 cm at any point - you can ensure this by hollowing out thick areas using a modelling loop. Alternatively, you can use a core made of paper, aluminium foil or chicken wire and cover it with FIMOair.
Processing finished FIMOair objects
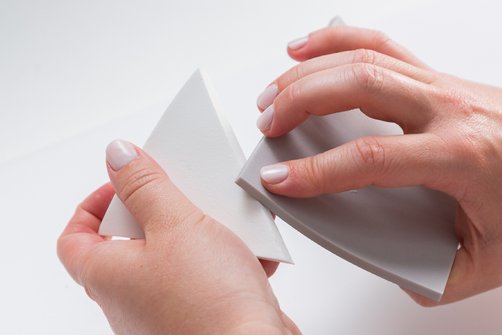
Sanding
A grit size of 400 is ideal for sanding fine surfaces and a grit size of 80 to 120 for larger surfaces.
Our tip: Line your work area with newspaper beforehand to save time and effort when cleaning afterwards.
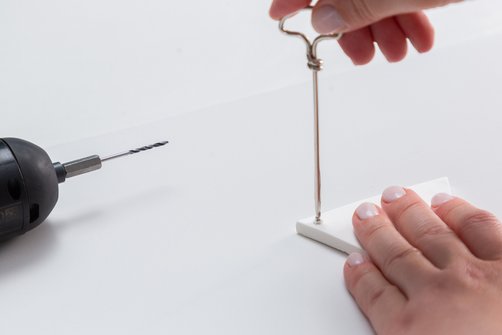
Drilling
Holes can be carefully drilled into dried models using a small, electric drill. You can also drill them with a hand drill.
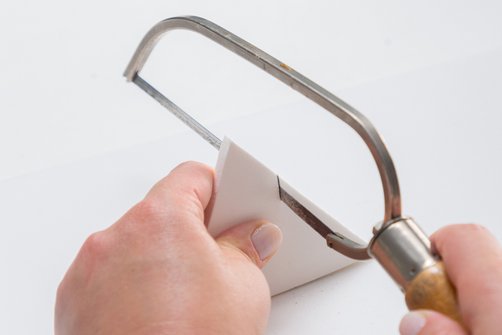
Sawing
You can saw dried models precisely with a small handsaw.
Our tip: Try a test piece first before working on your model with the saw.
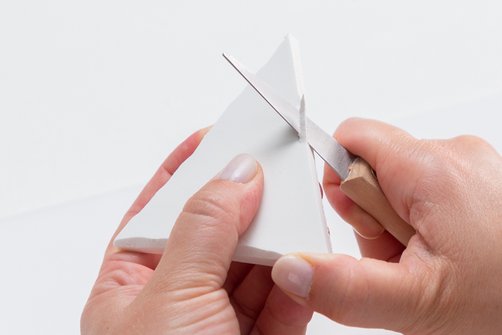
Carving
Carvings can be worked in using a special knife. Be extremely careful when doing this.
Our tip: Try a test piece first before working on your model.
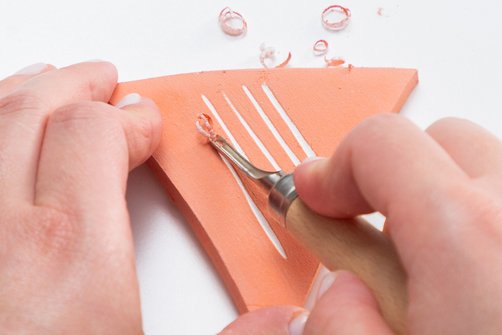
Incising
You can carve patterns with a pointed tool.
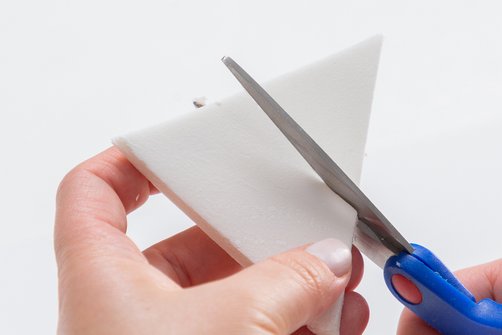
Cutting
If you roll out the FIMOair clay thinly enough first, you can even cut through it with scissors.
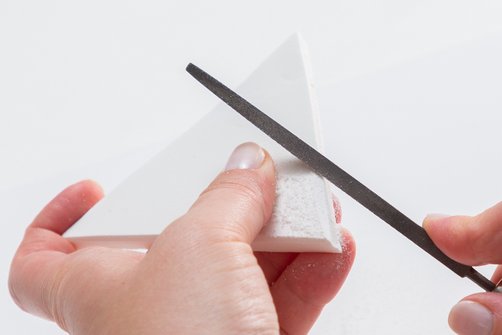
Filing
After hardening, your FIMOair model can also be finished with a file.
Gluing
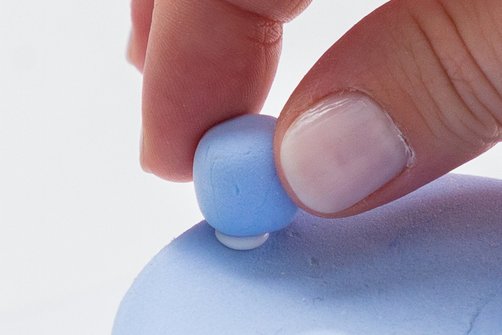
Parts have fallen off or you want to glue on new parts? You can use slip, all-purpose glue, wood glue or superglue for this.
Colouring and painting
Watercolours
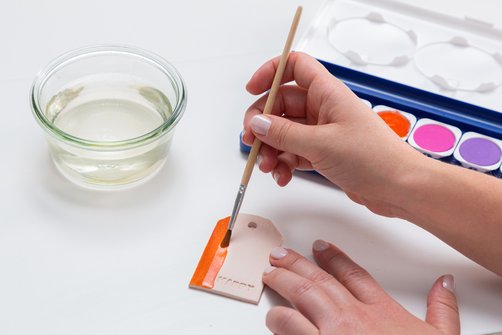
You can paint air-drying FIMOair clay with watercolours from the paint box. You should then seal the result with a double layer of varnish to prevent the paint from coming off.
Paint colours
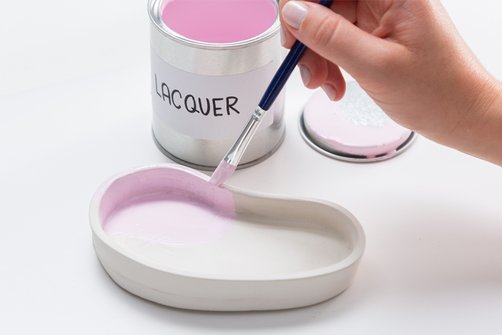
Hardened FIMOair clay can be decorated with acrylic markers, spray paint and lacquer paints. The use of lacquer paints makes the surface water-repellent, but not waterproof.
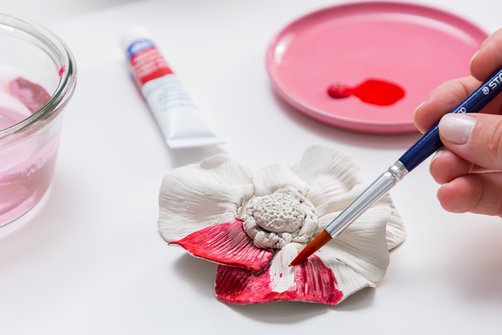
Watercolour paints
First wet the surface with water, and then apply the watercolour paint in a second step.
Our tip: Start with the lightest watercolour paint.
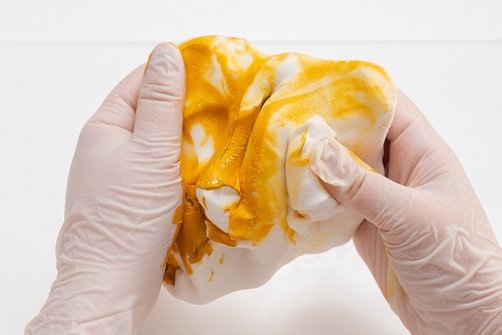
Colouring with acrylic paints
To colour the FIMOair modelling clay, you should add a small amount of acrylic paint and knead the clay thoroughly.
Our tip: Wear gloves when working in.
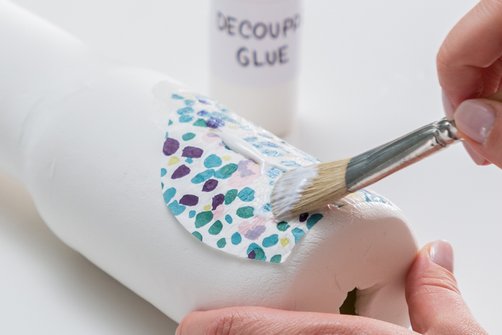
Napkin technique
First separate the layer of napkins and cut out the desired shape from the top layer with the motif. Now apply the napkin glue to the desired surface and attach the piece of napkin to it. Brush the piece of napkin firmly.
Important: Only use the napkin technique when the FIMOair is dry.
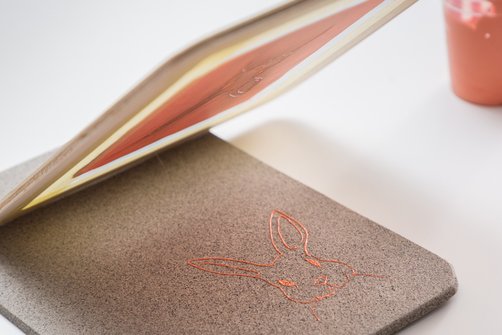
Silk-screening
Apply colours through a screen onto dried models using a squeegee or auxiliary tool. To achieve an optimal result, make sure that the motif does not slip.
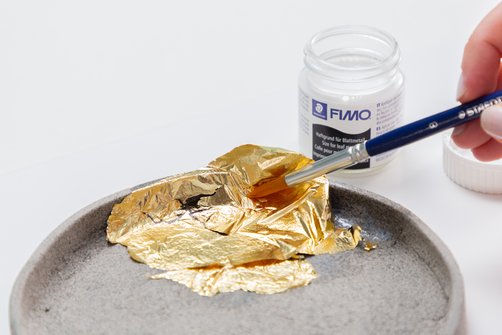
Gilding with metal leaf
The first step is to apply the adhesive base to your dried FIMOair model. You can then carefully apply the metal leaf with a brush and smooth it out. Leave the gilded model to dry - done!
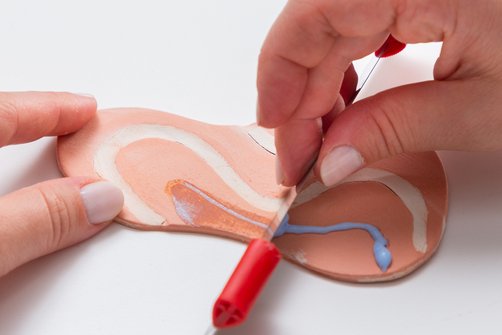
Slip painting
Use the drip technique and apply the liquid slip (using a bottle) to the desired areas. If you want to achieve a filling with slip, you can work in the pattern with a pointed tool. In a further step, you can apply slurry to the scored design and remove any excess slurry. Then carefully wipe over the area with a damp sponge - done!
Techniques
Roll & strip technique
Rolling technique
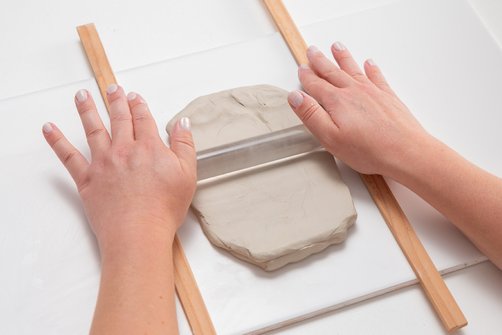
The first step is to roll out a base plate about 1 cm thick. Use conditioned FIMOair modelling clay for this. You can use spacers to roll out the clay evenly.
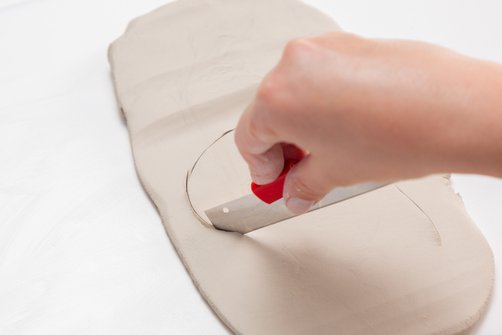
In the next step, you can cut out or cut out the base plate. Allow a margin of approx. 1 cm for the structure. Now you can carefully remove the FIMOair sheet and smooth the edges with your fingers.
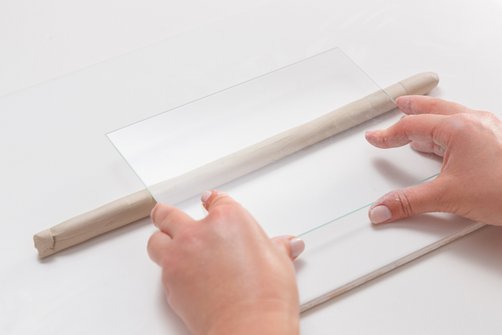
Now knead thick strings and roll them until they have a diameter of 1 cm.
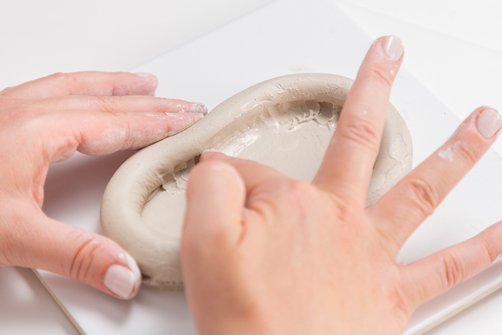
Our tip: Check regularly whether the length of the reel is sufficient and use a glass plate to achieve more even cords. You can cut the ends of the cords with a blade and shorten them to the desired length. Now you should roughen both the cords and the base plate and coat the roughened surfaces with slurry. Now place the first roll on top and connect the diagonally cut ends. Attach the other rolls using the same procedure and allow the overall result to dry at room temperature.
Strip technique
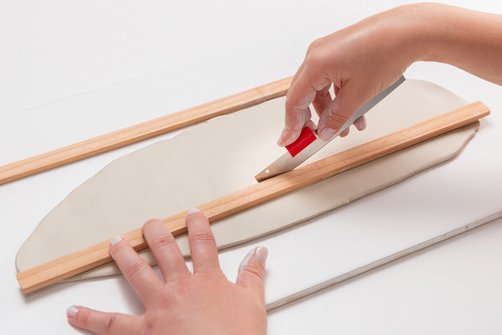
Roll out a 1 cm thick base plate for the strip technique too. Now use a blade to cut 2-3 cm wide strips.
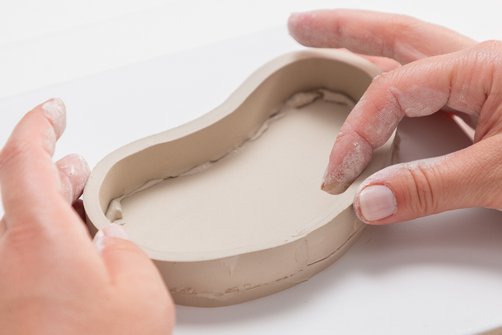
Then cut out the base plate, but allow 1 cm for the edge. Now carefully remove the base plate from the base and roughen both its edge and the long bottom edge of one strip. Coat both roughened surfaces with slip and place the first strip on top. Then join their ends and press them down carefully.
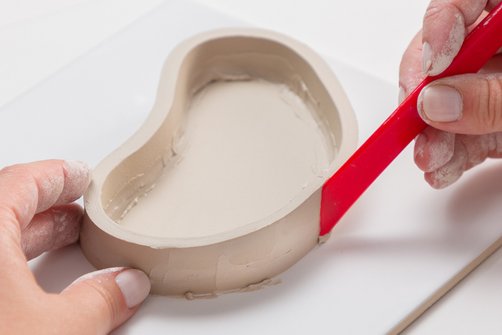
Repeat the previous steps and, in the final step, spread each applied strip outwards and inwards. Once your FIMOair model has reached the desired height, you can leave the artwork to dry at room temperature.
Plate technique (using the example of a little house)
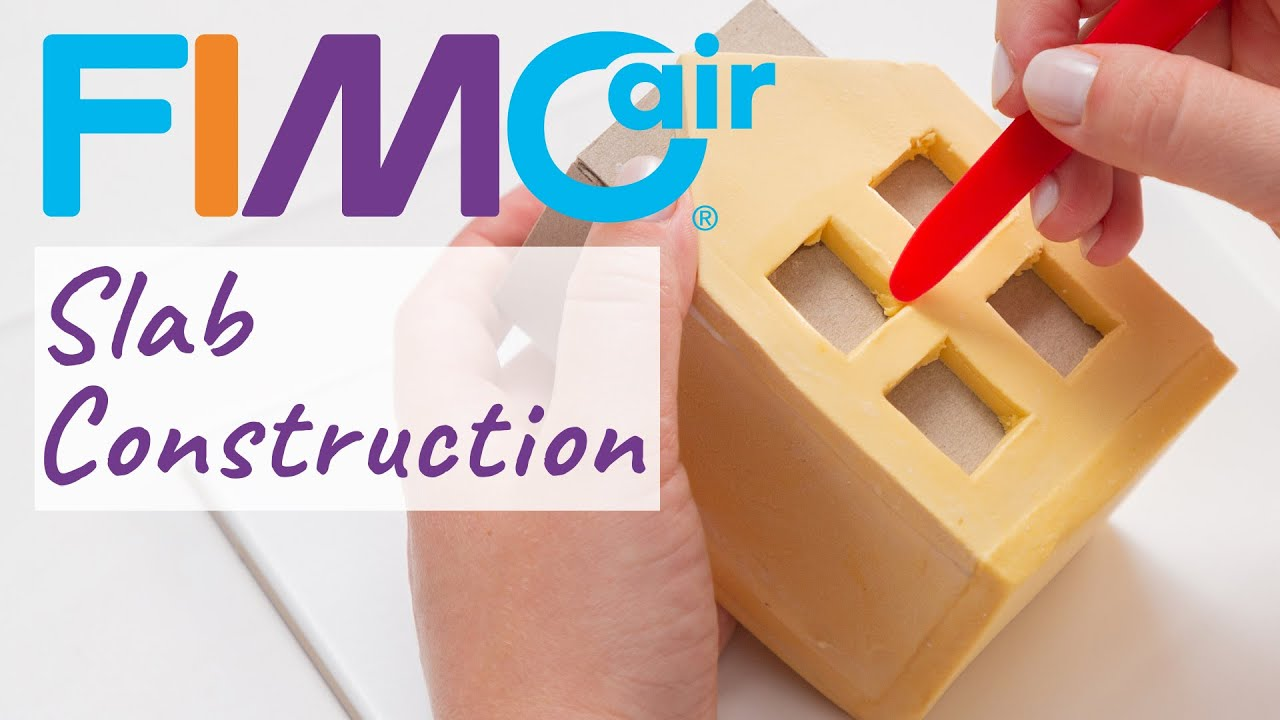
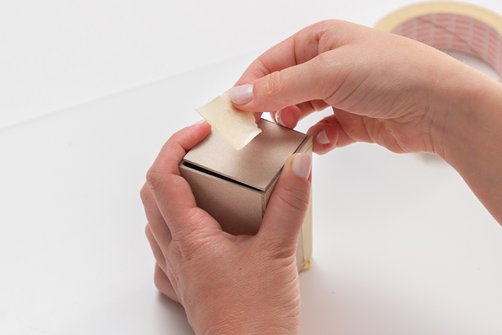
As a first step, you can build a support for the little house made of cardboard, glass or aluminium. If you want to create a coloured house, you should colour the FIMOair clay first. Add some acrylic paint to the modelling clay and knead both well. Make sure you wear gloves for this.
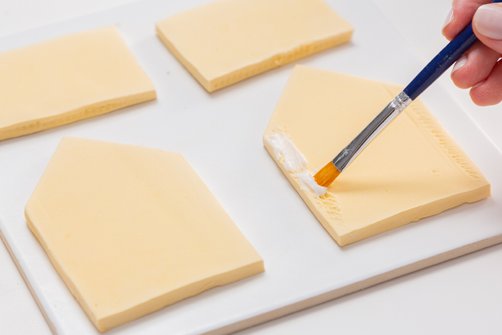
Then roll out the sheet evenly using spacers and cut out the required sheets. In the next step, roughen all the edges and coat them with slip. Then fit the panels around the support, join the seams and smooth out any excess slip.
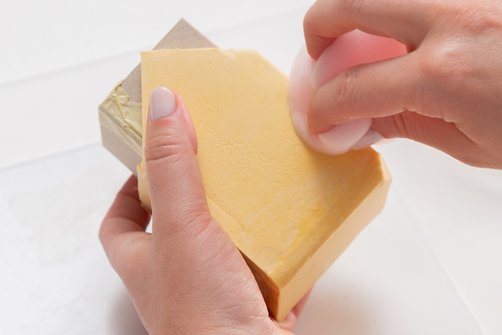
Then cut out the base plate, roughen its edges and coat them with slip to connect them to the body of the house. Smooth the surface with a damp sponge - the foundation is finished.
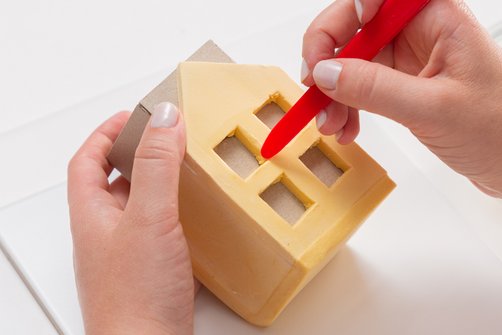
All that's missing are the details: you can cut out windows with a cutting knife or a scalpel - make sure that their frames are not too thin. Once you have cut them out, you can smooth their edges with a little water and your finger or a modelling stick. Leave the little house to dry completely on an air-permeable surface at room temperature and then remove the support.
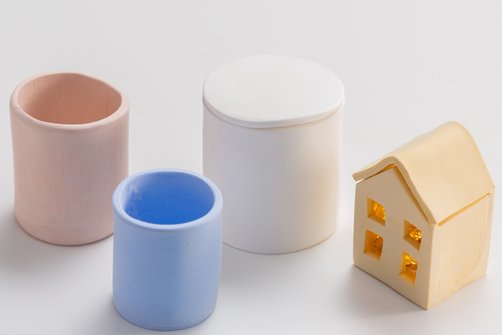
You can use LED tea lights and fairy lights to set the scene for the little house and add a romantic detail. However, you should not use real candles. You can also create round shapes using the plate technique.
Supporting forms & encasing
Supporting forms
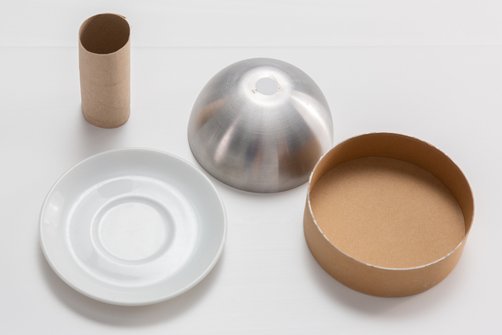
You can use various objects from your household for the mould supports: Bowls, plates or even cardboard boxes. In the following, we will explain how to use a decorative bowl to create mould supports.
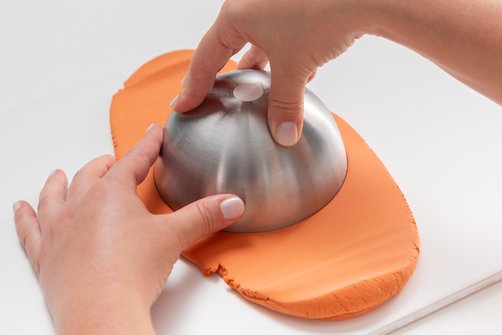
When crafting with FIMOair, you can use spacers to roll out the modelling clay evenly. In a second step, you can place the bowl on top and cut out a circle.
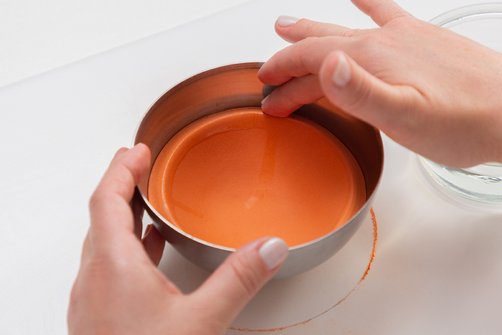
Carefully remove it from the base and press the circle into the bowl, then smooth the edges with your fingers and a little water.
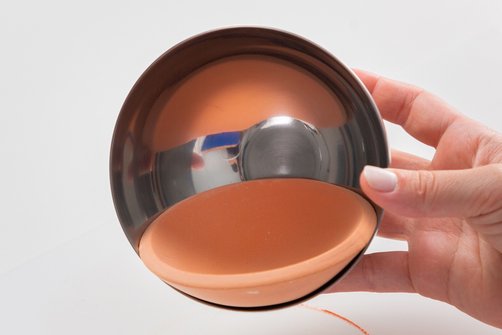
Leave the modelling clay to dry out and then remove it from the bowl - done!
Encasing
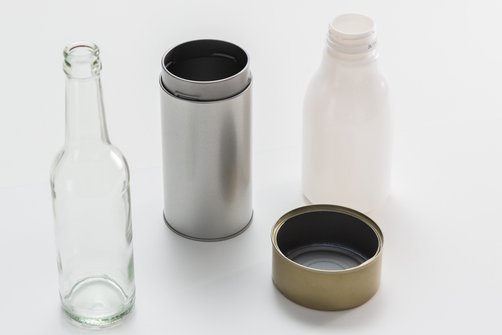
You can use household items such as jars, tin or bottles for the coating.
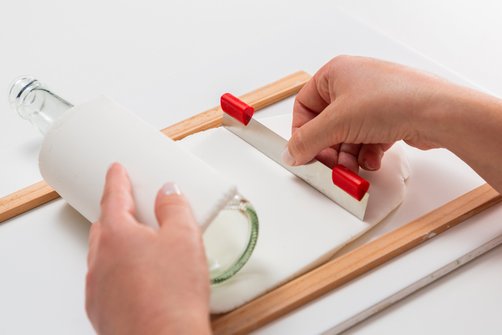
To do this, roll out FIMOair to a sufficient size using spacers. Use a blade or knife to trim the sheet as desired and cut the edges at an angle.
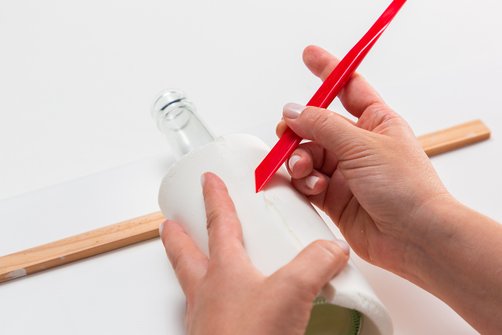
Now place the FIMOair sheet around the bottle, press the edges together and smooth them out. Use a modelling stick to smooth out the joints and close the base. Any remaining FIMOair can be attached to the neck of the bottle and pressed into place.
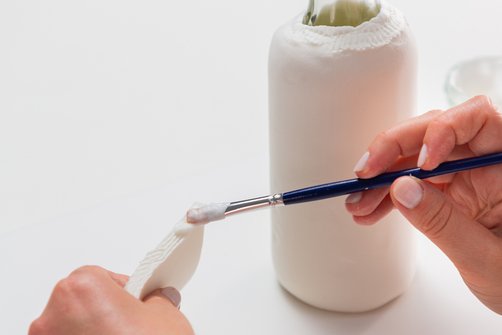
Would you like to attach more parts? Then roughen the relevant areas and attach the parts with slip. You can seal the joints, smooth them with a modelling stick and smooth them with a damp sponge.
Our tip: FIMOair shrinks as it dries, which can cause cracks. However, the latter can be sealed again with slip.
Figures & Sculptures
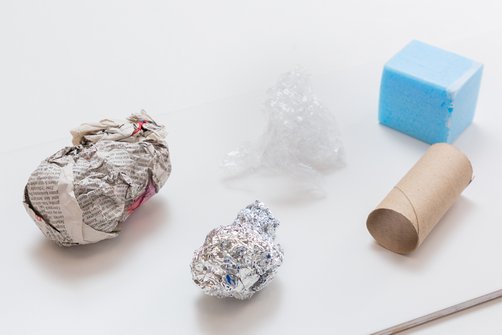
A base is recommended for larger sculptures or figures. The materials required include: Household foil, cardboard or polystyrene, aluminium foil and newspaper.
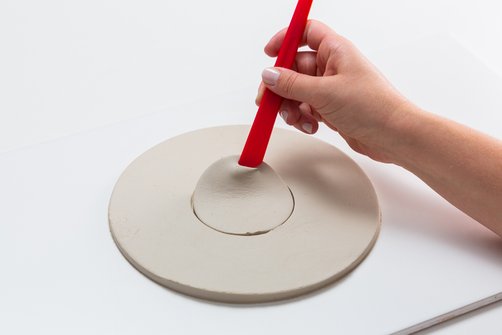
First roll out the FIMOair clay and cut out a wide circle, which you can carefully lift out with a modelling stick.
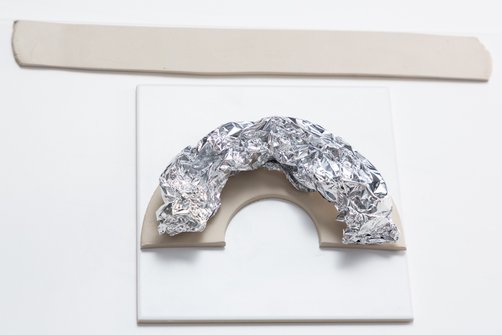
Cut the circle in half, measure the arc length of one half and roll out a FIMOair sheet of the appropriate size. Now cut two strips - one must be at least as long as the measured outer arc, the second strip can be slightly shorter. Shape the arched base with aluminium foil, roughen the edges and coat them with FIMOair slip.
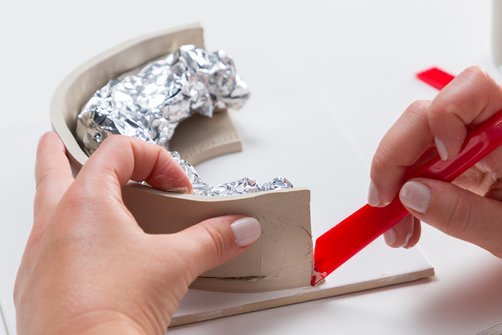
Now attach the long strip, cut off the protruding ends and smooth out the joints using a modelling stick and slip.
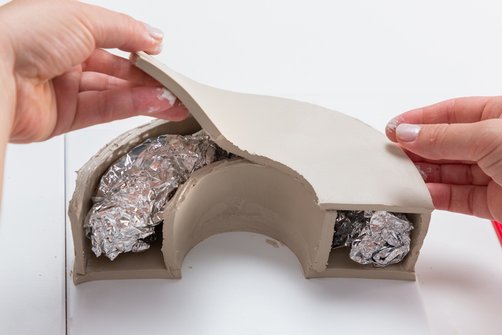
Repeat the same steps with the shorter inner strip and attach the second sheet. Here, too, the edges must first be roughened, coated with slip and the joints smoothed with a modelling stick and slip.
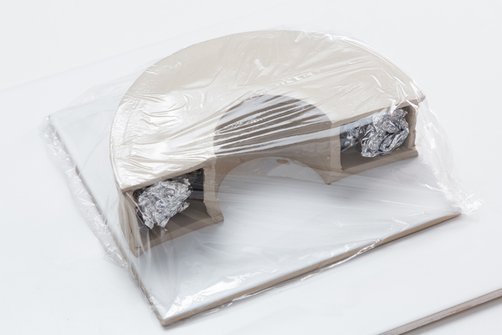
Finally, you can smooth all the edges with a damp sponge and cover the overall result with household foil to prevent cracks. Now leave your new work of art to dry at room temperature.
Creating objects
Tips for rolling out
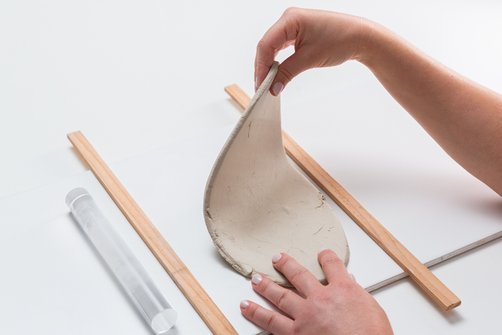
First of all, you should prepare the right work surface. In addition to tiles, baking paper, smooth wooden boards or silicone mats are also suitable for this. Condition the FIMOair before rolling it out. To ensure that the surface is even, you should use spacers to guarantee a uniform shape. If there are any air pockets, you can pierce them with a needle and then smooth them out again.
Our tip: Turn the sheet regularly when rolling it out.
Working with templates
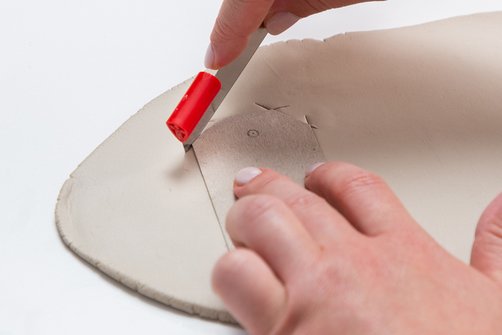
Place the template in question on the rolled-out FIMOair and remove the remaining residue outside the template with a blade or knife. Or use a stamp instead to decorate your FIMOair masterpiece with a pattern or other ornament.
Cutting out with moulds
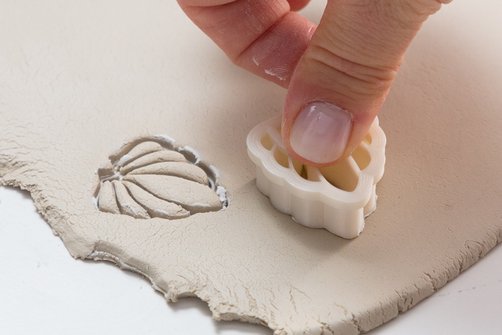
Use the mould of your choice for this technique. Sprinkle them with cornflour so that you can release the modelling clay easily. Now press the mould into the FIMOair modelling clay and move it gently back and forth. In a final step, you can remove the surrounding FIMOair.
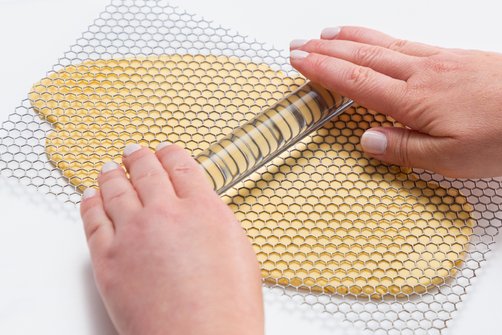
Structuring the surface
Use a structure or texture plate and roll over it with the acrylic roller until the pattern has reached the desired depth and expressiveness.
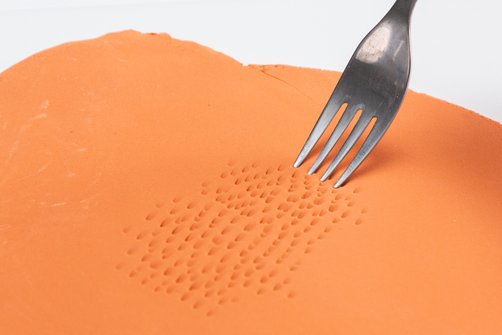
With household items
Would you like to turn your artwork into a real eye-catcher with special structures? You can do this with household items such as buttons or forks.
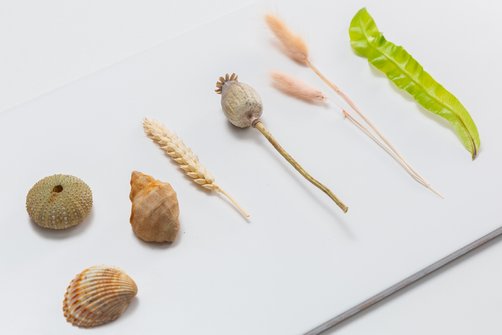
From nature
Take inspiration from nature! To do this, place leaves, shells or grasses on the FIMOair, press them down and roll over them with the acrylic roller. In a final step, you can carefully remove the objects used.
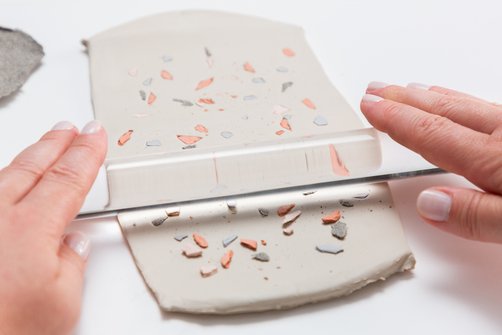
Terrazzo look
Create an exciting terrazzo look by cutting up thin, hardened FIMOair sheets in different colours and spreading them over a plain FIMOair sheet. Connect the coloured pieces to the sheet by running the acrylic roller over them - done!
Shapes
Beads

Shape an even strand of FIMOair by rolling it out by hand. Cut off even pieces with a knife or blade and roll them into round beads between the palms of your hands.
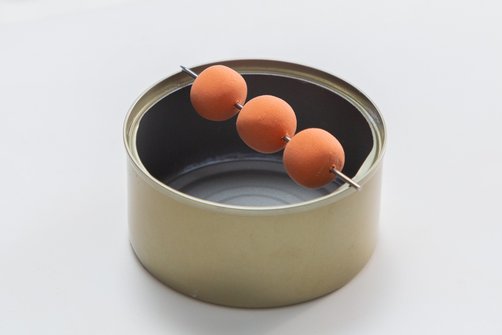
Use a thin needle to make the hole and a thicker needle to enlarge the hole. You can line up the resulting spherical beads on a needle and hang them up to dry at room temperature so that no dents form.
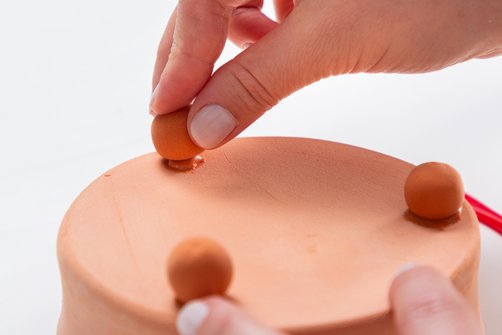
If you want to add more details to the result, you can moisten the attachment points with water, roughen the surfaces and coat them with slip. Now carefully press on the other parts and leave the final result to dry at room temperature.
Cords
Roses
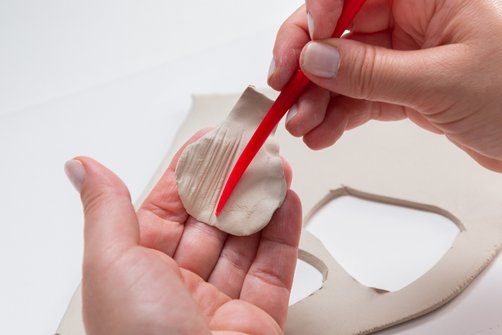
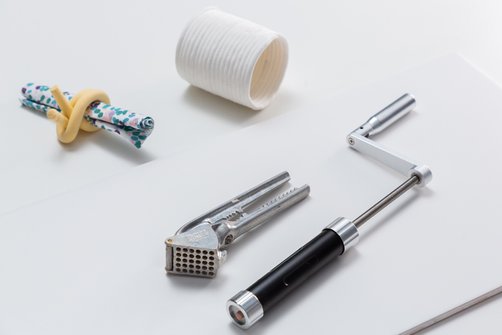
Roll out a thin sheet of FIMOair and cut out petal shapes with a knife or blade. You can then shape each petal as desired and decorate it using the modelling stick.
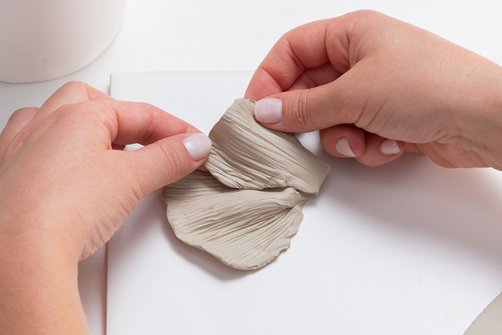
Repeat these steps when creating other petals, arranging them in a staggered circular pattern.
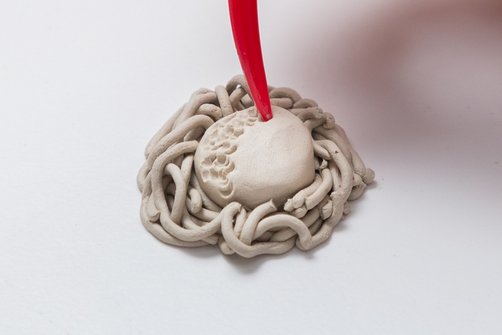
Press more FIMOair clay through a garlic press to create strings and shape them into a nest. Press a flat, round part into the middle of the nest and use a modelling stick to make fine dents to give the core as natural a look as possible.
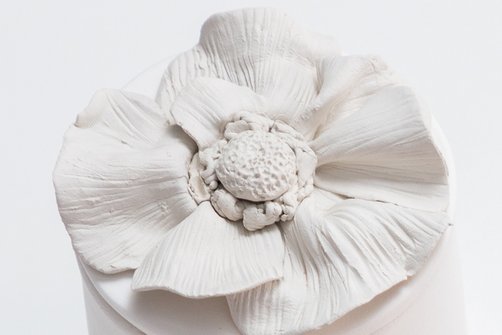
In a final step, place the core in the middle of the flower, press it down and leave the FIMOair rose to dry at room temperature.
Molding
Silicone mould
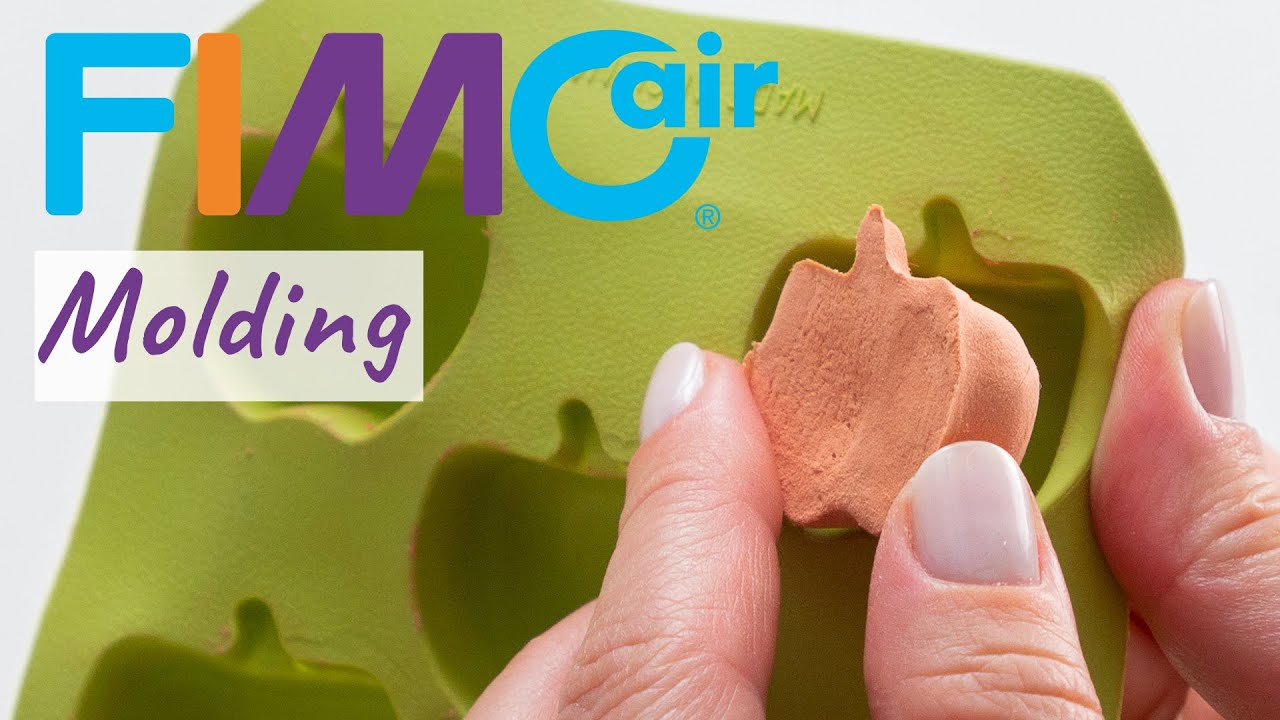
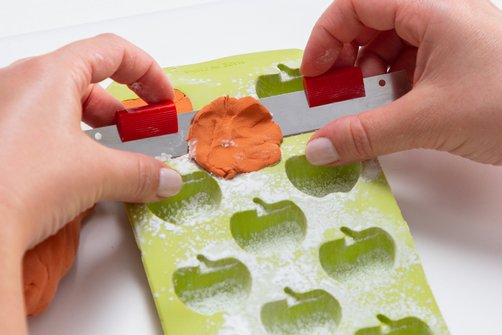
Sprinkle the silicone mould with cornstarch and then tap it out. Knead small pieces of FIMOair and fill the mould completely with the air-drying modelling clay. You can remove any excess FIMOair with a blade and leave the final result to dry at room temperature.
Thermoforming moulds
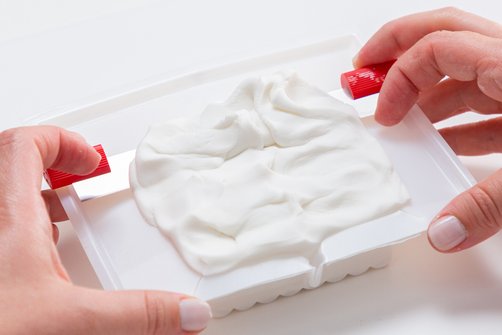
As with the previous FIMOair instructions, you should sprinkle the mould with cornstarch and tap it out. Press the FIMOair mixture into the mould, remove excess modelling clay with a blade and leave the result to dry at room temperature.
Reliefs
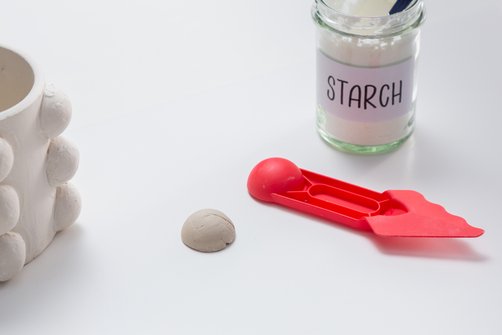
You can create design elements using the same technique. To do this, sprinkle the mould with cornstarch, tap it out and fill it with FIMOair clay. Leave the contents to dry out at room temperature and then apply the design element in the desired position using slip.
Kaleidoscope & Marbling
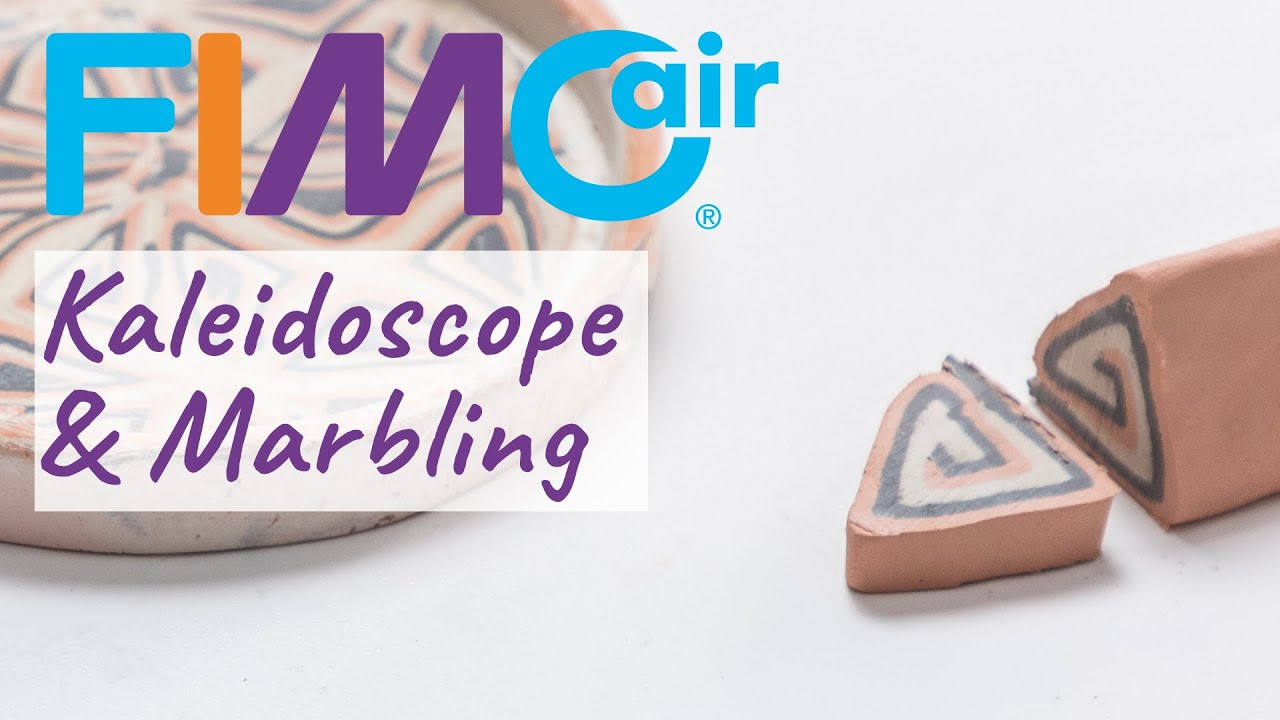
Kaleidoscope
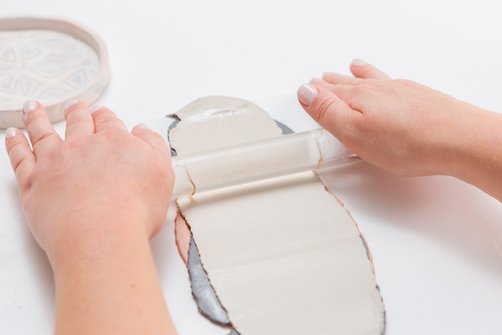
Roll out three FIMOair sheets in three different colours, moisten them with a damp sponge and place them on top of each other. Join the three sheets by rolling over them with a roller.
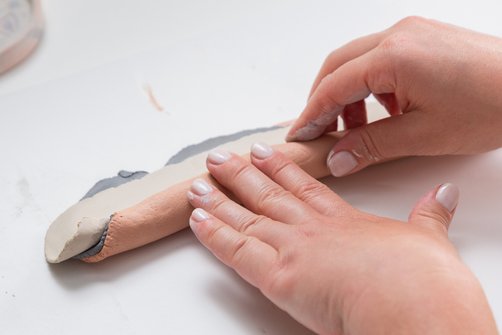
Then cut a straight longitudinal edge and roll the three-layer sheet lengthwise.
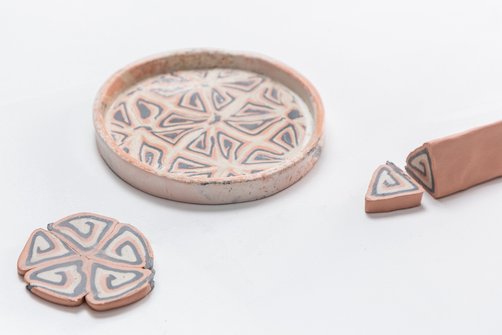
You can then shape the resulting strand into a triangle, cut off pieces of the same size, arrange them in a pattern and roll over them with the acrylic roller.
Marbling
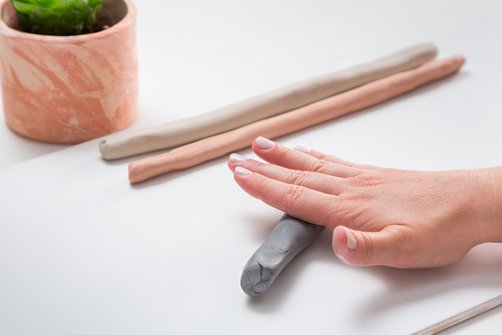
You can use FIMOair with colours to create a pattern.
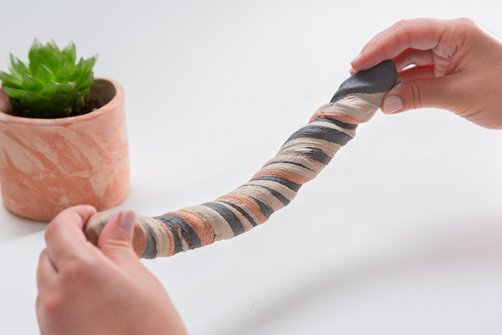
To do this, roll out strands of different coloured FIMOair, twist them together, form a ball and then another strand. Twist this again and form another ball. Repeat these steps until you are happy with the marbling.
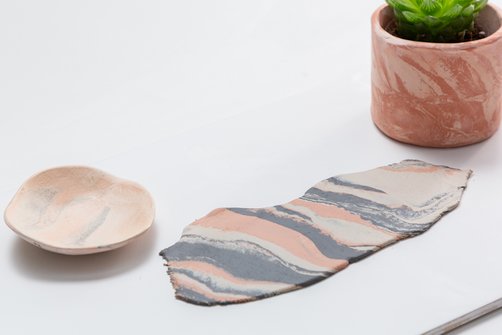
Once this is the case, you can use the FIMOair modelling clay to implement your craft ideas.
As you can see, you can realize numerous ideas with FIMOair and use conventional household items such as flower pots or glasses to implement your FIMOair ideas. We wish you lots of fun and enjoyment!