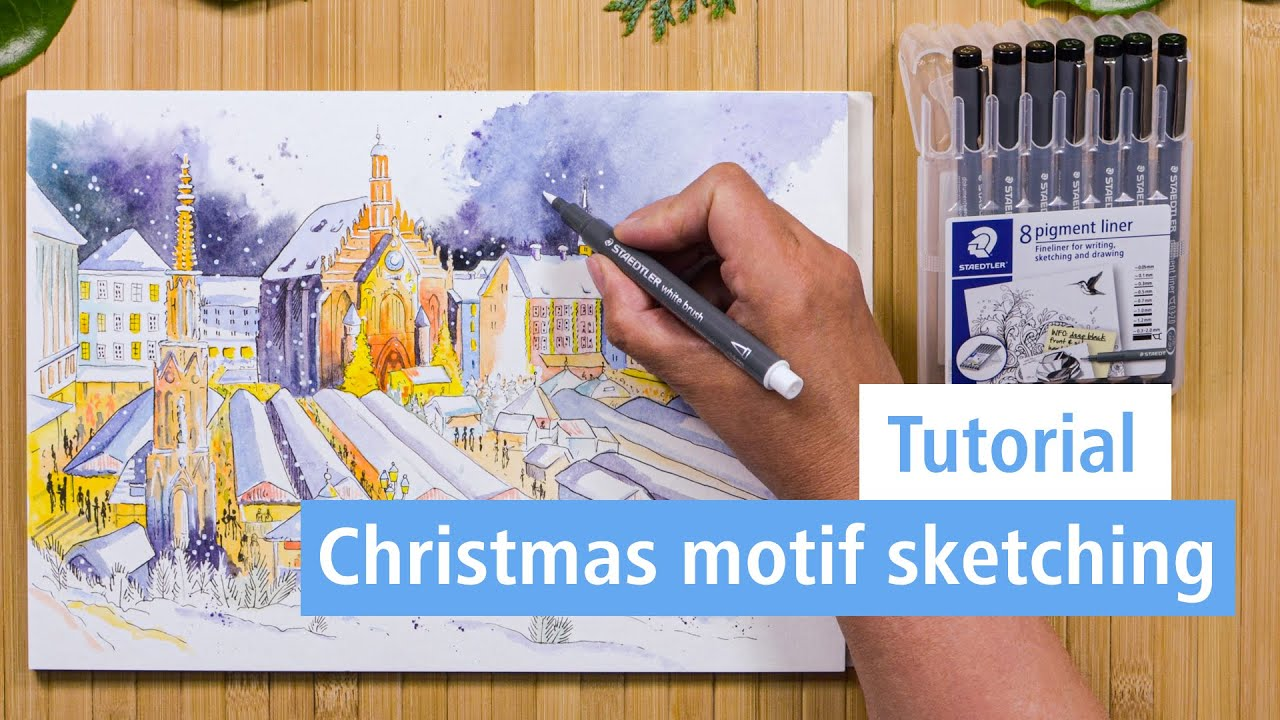
Urban sketching - Christmas motif

This tutorial shows you how to create a Christmas motif of the city of Nuremberg in an urban sketching style using watercolours. Nuremberg is known for its atmospheric Christmas market and historic old town. This image will not only catch the eye within your own four walls, but it is also perfect for home-made Christmas cards.

An article by Claudia
- Direct to:
- Tutorial video
- Material overview
- Step-by-step tutorial
Tutorial video
Material overview
What you need
Step-by-step tutorial
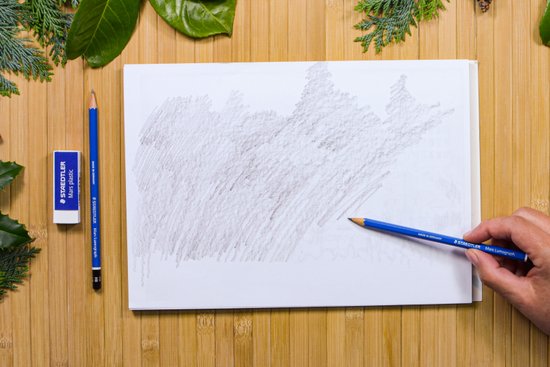
Print out the motif template. Using a very soft pencil (Mars Lumograph, 5B or 7B), evenly shade the back of the template motif.
The softer the pencil, the better this technique works.
Precisely place the template (with the front facing up) on the watercolour paper. Then trace round the motif using a hard pencil (Noris, HB). This will transfer the motif to the paper. Before removing the template, lift the bottom corners and check that all the lines have been transferred.
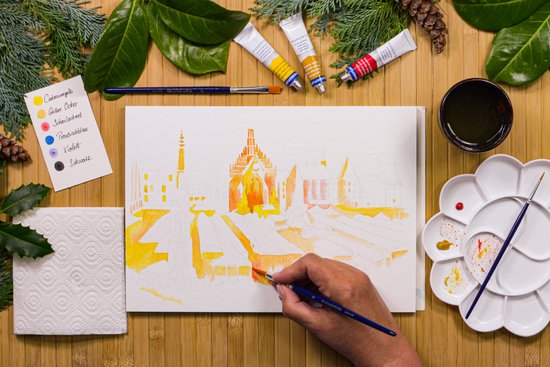
Mix cadmium yellow, yellow ochre and scarlet red and colour the illuminated areas of the Christmas market in warm shades. The illuminated front of the “Frauenkirche” also receives these warm shades.
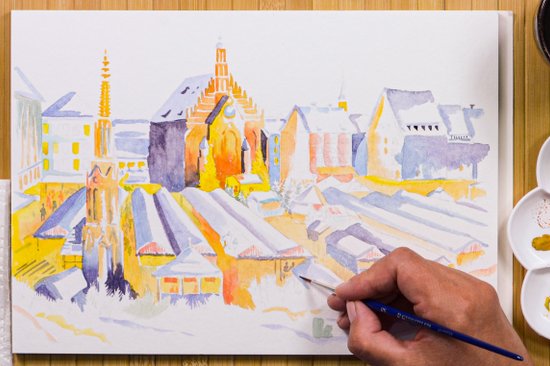
The snowy roofs are then highlighted with mixed shades of Prussian blue, violet and black. Accentuate the shadowy side of the church in dark purple. Emphasise the houses at the back using blue and violet shades. All colours used are applied in a highly diluted form to the lower edge of the image, to reflect the light in the snow. Add a little diluted purple and blue to the bottom of the image to bring it more to life.
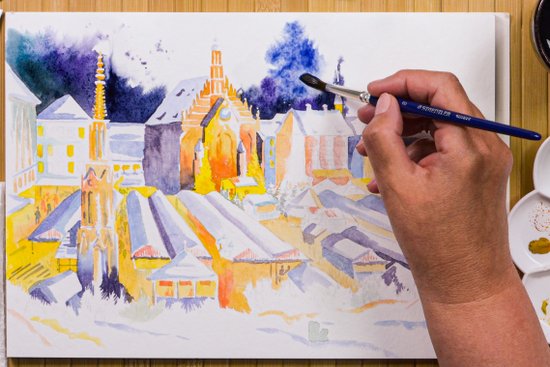
For the sky, mix a dark blue-black and violet-black. Dampen the sky to the left of the church with the flat brush and clean water. Edge the roofs of the houses precisely with colour. Then draw the watercolours loosely towards the church and allow the paint to run out slightly towards the upper edge of the picture. Proceed in a similar way on the right side of the sky. After drying, drop some spots on the sky to make the effect more subtle.
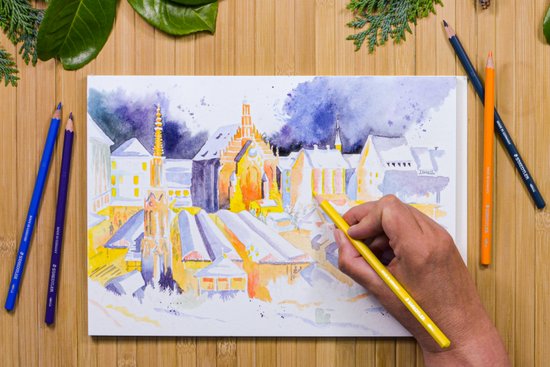
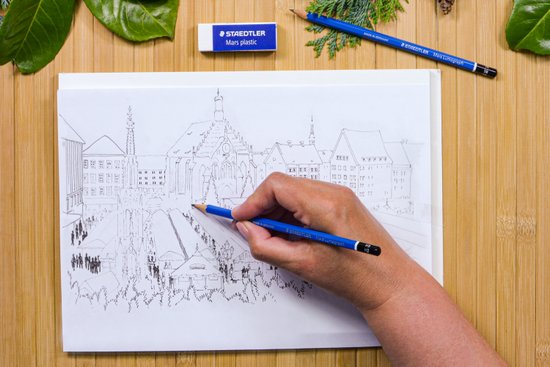
Draw fine details on the buildings with watercolour pencils. Less is more here – don’t be too precise.
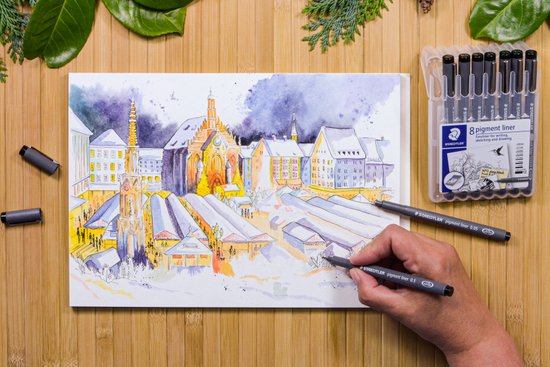
Now trace the pencil lines loosely using the pigment liners. Uneven lines liven up the image – after all, it isn't meant to be an architectural drawing. Draw people by drawing a dot as their head, then a long line down as their leg, a second line for the second leg, and fill in the body in between.
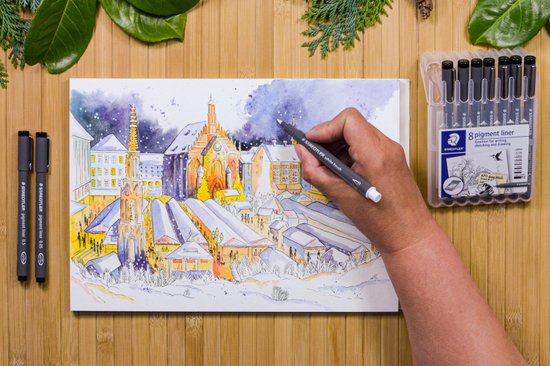
Use the white brush pen to dab snowflakes everywhere. The white dots stand out particularly well on dark surfaces.
Tip: Go over the snowflake dots several times. They become whiter with each layer.
No time right now?
Save this article as PDF!