Creative Christmas tree

Christmas is just around the corner. But do you have the space for a great big Christmas tree?
Here’s the good news: Christmas trees don‘t always have to be a traditional large fir tree. It‘s quick and easy to make a creative tree from branches, which can be hung on the wall and will fit into even the smallest apartment. And home made decorations from wood and FIMO will provide a personal touch. This combination of rustic wood and delicate FIMO ornaments creates a charming look.
Step-by-step tutorial

First you need to construct the basic triangular form of your Christmas tree. To do this, position branches of different widths underneath each other and fasten them together with natural twine.
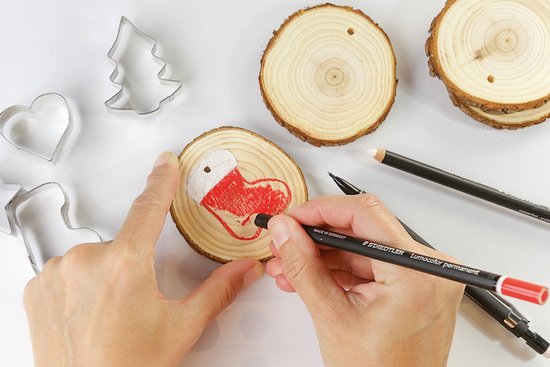
The branches should be about 15 cm apart from each other. Decorate the wooden ornaments using Lumocolor permanent glasochrom dry markers – they are waterproof and suitable for use on almost all surfaces.
You can either draw your design directly onto the wooden disc by hand or use a small cookie cutter as a template: draw round it with a thin mechanical pencil and then colour in the shape using dry markers.

Place a block of white FIMO soft on a smooth working surface (glass or ceramic) and roll out into a 2 mm sheet using the acrylic roller.
Then cover part of the sheet with the doily and roll over with the acrylic roller again.
Carefully remove the doily. The pattern should now have been embossed onto the sheet. Cut out different shapes using the cookie cutters.

You can also add words or names to your FIMO decorations. Little letter stamps are great to use for this.
Place the letters of your word in the holder (back to front!) and press them gently into the FIMO soft.
Use the ball modelling tool to pierce a hole at the top of each decoration. Harden the FIMO decorations in the oven for 30 minutes at 110° C / 230° F. Leave to cool.
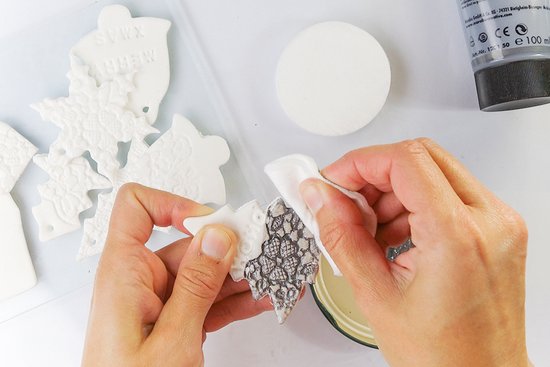
You can highlight some of the pretty embossed details you have created using anthracite coloured acrylic paint.
More paint will stick to the indentations than to the surface, creating a contrasting pattern. Apply acrylic paint to the areas you want to highlight and wipe the surface using a cotton wool pad.
Leave to dry completely.
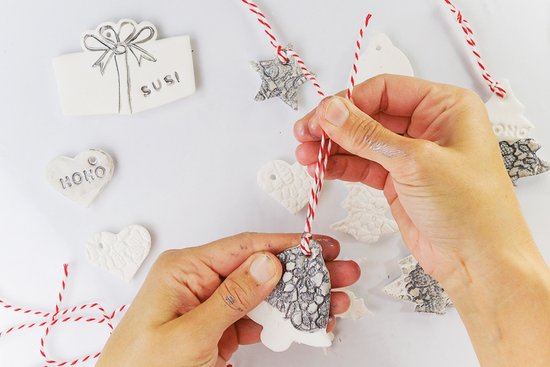
To attach your decorations to presents or to your Christmas tree, thread pieces of cord, cook’s string or natural twine about 20 cm long through the holes and tie at the top.
DONE!
Material overview
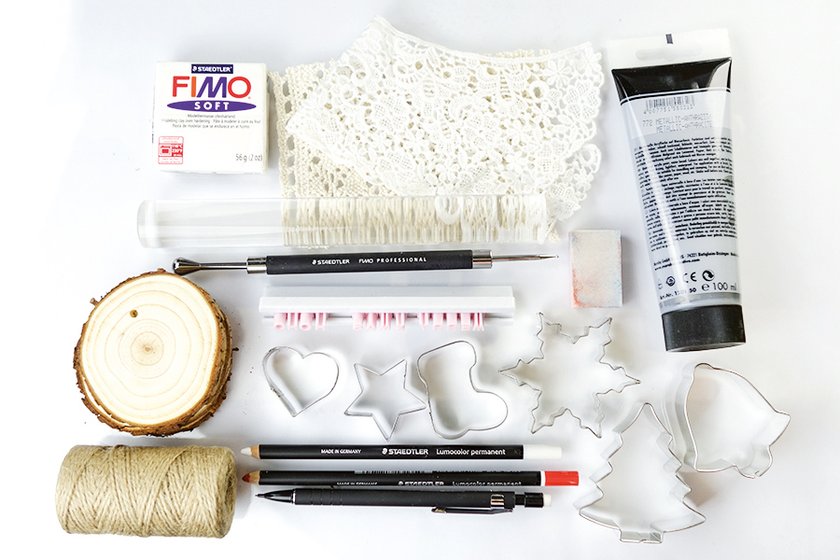
What you need
Additionally required:
Smooth working surface (glass or ceramic), doily, anthracite acrylic paint, cotton wool pads, cook’s string and natural twine, letters for embossing, different cookie cutters, wooden discs with holes, branches in a range of lengths, fairy lights
No time right now?
Save this article as PDF!


